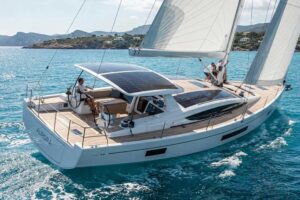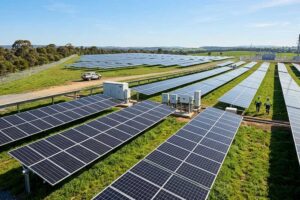
Flexible Solar Panel Installation: Complete Guide to Mounting, Wiring, and Setup
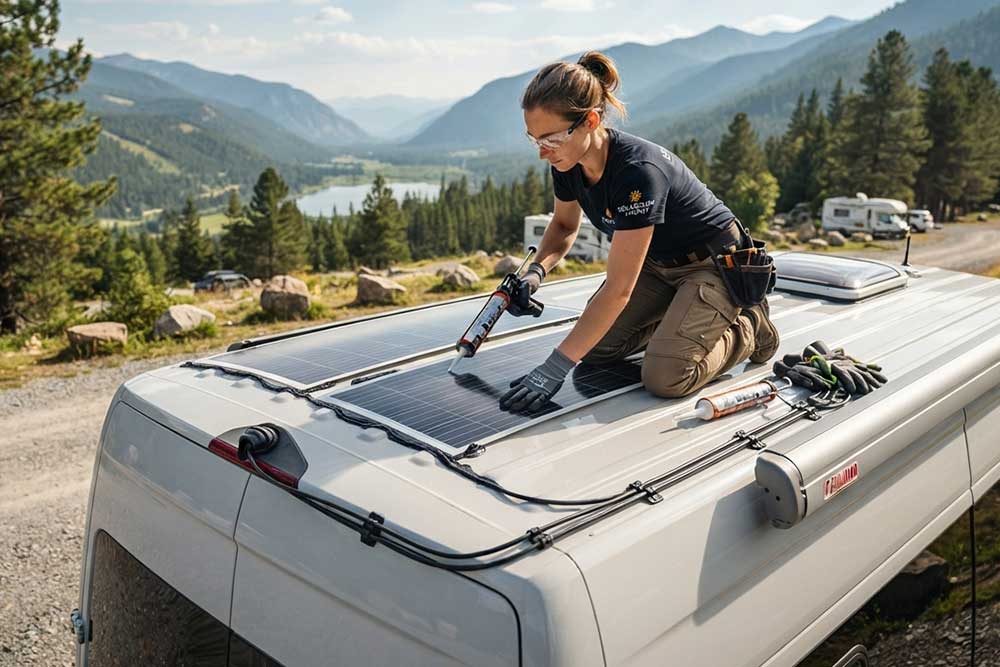
Introduction
Flexible solar panel installation requires more than simply attaching a solar module to a surface. A successful installation depends on choosing the right mounting method, preparing the surface correctly, protecting electrical connections, and ensuring proper system performance. Whether installed on RVs, boats, vehicles, or off-grid systems, the correct installation approach directly affects efficiency and service life.
Compared with traditional rigid solar panels, flexible solar panels offer advantages such as lower weight, easier handling, and better compatibility with curved surfaces. However, their lightweight design also requires careful installation to prevent issues such as poor adhesion, overheating, or cable damage.
At Bright Solar, we have worked with different flexible solar panel applications and understand that installation conditions vary greatly between RV roofs, marine environments, and customized solar projects. This guide explains the complete flexible solar panel installation process, including mounting methods, preparation steps, wiring, common mistakes, and maintenance recommendations.
What Is Flexible Solar Panel Installation?
Flexible solar panel installation is the process of securely mounting flexible photovoltaic panels onto a surface and connecting them to a solar power system. Unlike rigid solar panels that usually require aluminum frames and mounting brackets, flexible panels are designed for lightweight applications where traditional mounting methods may not be practical.
Flexible solar panels are commonly installed on:
- RV roofs and camper vans
- Boats and marine equipment
- Trucks and trailers
- Portable solar systems
- Off-grid buildings
- Custom curved surfaces
The main difference between flexible and rigid solar panel installation is the mounting approach. Rigid panels typically rely on brackets, rails, and fixed structures, while flexible panels are often attached using adhesive, mounting tape, or low-profile fixing solutions.
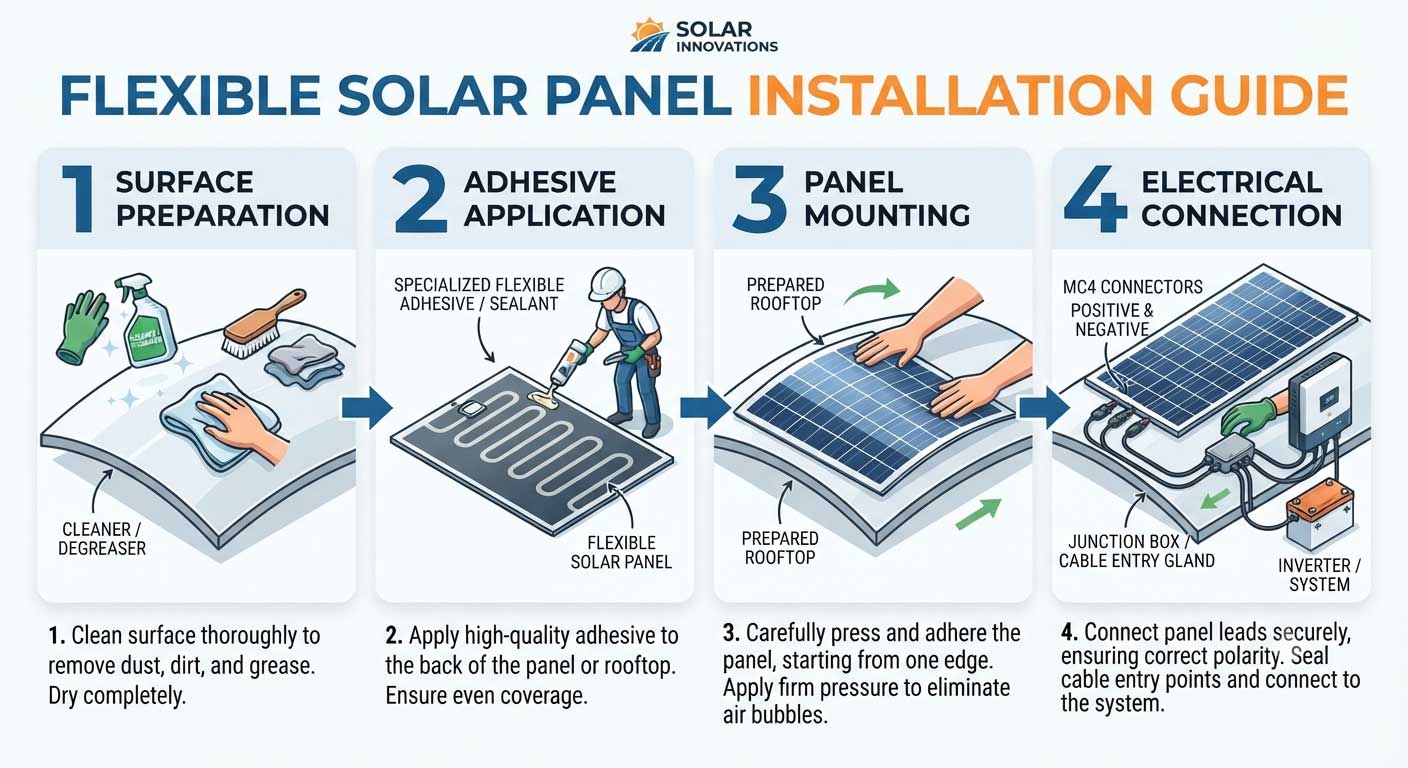
A typical flexible solar panel installation includes four main steps:
- Surface preparation – Cleaning and preparing the installation area to ensure strong adhesion.
- Panel mounting – Selecting a suitable attachment method based on the application.
- Electrical connection – Connecting the solar panel to charge controllers, batteries, and other system components.
- System testing – Checking voltage output and ensuring reliable operation.
Although flexible solar panels are easier to install compared with many traditional systems, correct installation is still essential. A poorly installed panel may experience reduced efficiency, loose attachment, water damage, or premature aging.
For example, an RV solar installation must consider factors such as roof material, vibration during driving, temperature changes, and cable protection. A marine installation requires additional attention to waterproofing and corrosion resistance.
Choosing the right flexible solar panel is also important. High-quality panels with durable materials, such as ETFE surface coatings and reliable encapsulation technology, are better suited for outdoor environments because they can withstand UV exposure, moisture, and temperature variations.
Bright Solar focuses on providing flexible solar solutions designed for real-world applications, helping customers achieve reliable renewable energy performance across different environments.
What You Need Before Installing Flexible Solar Panels
Before starting a flexible solar panel installation, proper preparation can prevent most common problems. Many installation failures are not caused by the solar panel itself but by incorrect surface preparation, unsuitable mounting materials, or poor system planning.
A professional installation begins with three key checks:
- Installation location
- Required tools and materials
- Solar system design
Installation Tools Checklist
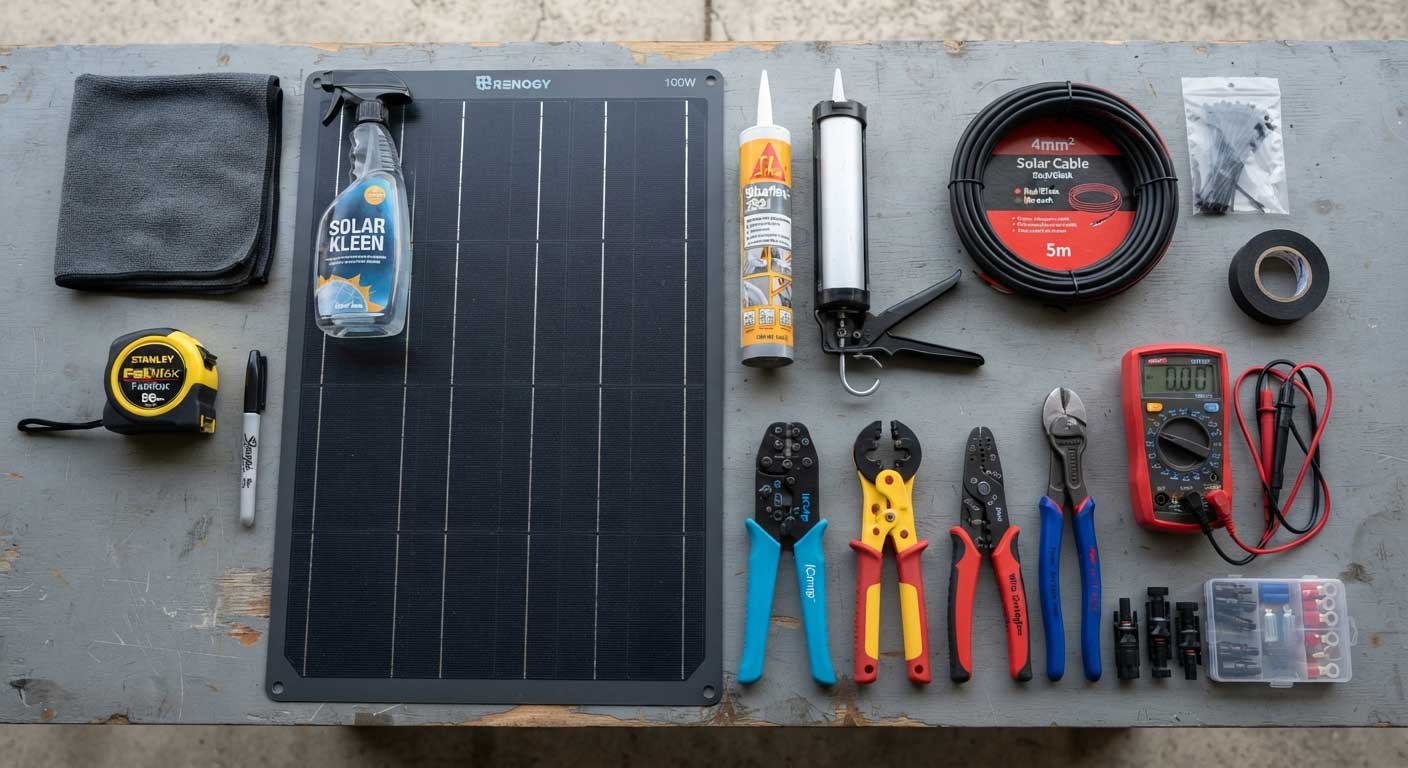
The tools required may vary depending on the mounting method, but most flexible solar panel installations require:
Cleaning Tools
- Microfiber cloth
- Cleaning solution
- Isopropyl alcohol
- Soft brush
A clean surface is essential because dust, grease, or moisture can weaken adhesive bonding.
Measuring and Positioning Tools
- Measuring tape
- Marker
- Level tool
Before attaching the panel, mark the installation position carefully. This prevents alignment problems and ensures enough space for wiring connections.
Mounting Materials
Common mounting options include:
- Industrial-grade adhesive
- Marine-grade sealant
- Double-sided mounting tape
- Mounting brackets
The correct choice depends on the application.
For example:
- RV roofs often use adhesive mounting because reducing weight is important.
- Large permanent installations may require additional mechanical fixing.
- Portable systems may need removable mounting solutions.
Electrical Installation Tools
For connecting the solar system, prepare:
- MC4 connector tools
- Wire cutters
- Cable strippers
- Multimeter
- Heat shrink tubing
Proper electrical connections are just as important as mechanical installation. Loose connections can create power losses and safety risks.
Check the Installation Surface Before Mounting
The installation surface determines how well the flexible solar panel will perform over time.
Before installation, check:
Surface Material
Flexible solar panels can be installed on many surfaces, including:
- Fiberglass
- Aluminum
- Steel
- Composite materials
- RV roofing materials
However, each surface may require different preparation methods.
Surface Condition
The mounting area should be:
- Clean
- Dry
- Flat or smoothly curved
- Free from oil and dust
Avoid installing flexible solar panels on:
- Damaged surfaces
- Loose paint
- Uneven areas
- Extremely hot surfaces
Consider Heat Exposure
Flexible solar panels are often mounted directly onto the surface, which means heat management is important.
Dark roofs, metal surfaces, and areas with limited airflow may increase operating temperature.
Higher temperatures can reduce solar efficiency, so installation planning should consider:
- Panel location
- Ventilation conditions
- Local climate
Plan Cable Routing
Before fixing the panel permanently, determine where cables will run.
Good cable planning helps avoid:
- Sharp bends
- Water entry points
- Mechanical damage
- Difficult maintenance
For RV and marine installations, cable protection is especially important because vibration and weather exposure can affect long-term reliability.
A successful flexible solar panel installation starts before the panel is attached. Proper preparation improves bonding strength, electrical reliability, and overall system lifespan.
Flexible Solar Panel Installation Methods Compared
Choosing the correct mounting method is one of the most important decisions during a flexible solar panel installation. The best method depends on the application, installation location, environmental conditions, and whether the system needs to be permanent or removable.
Unlike rigid solar panels that usually rely on aluminum frames and mounting rails, flexible solar panels require attachment solutions that protect the panel while maintaining flexibility.
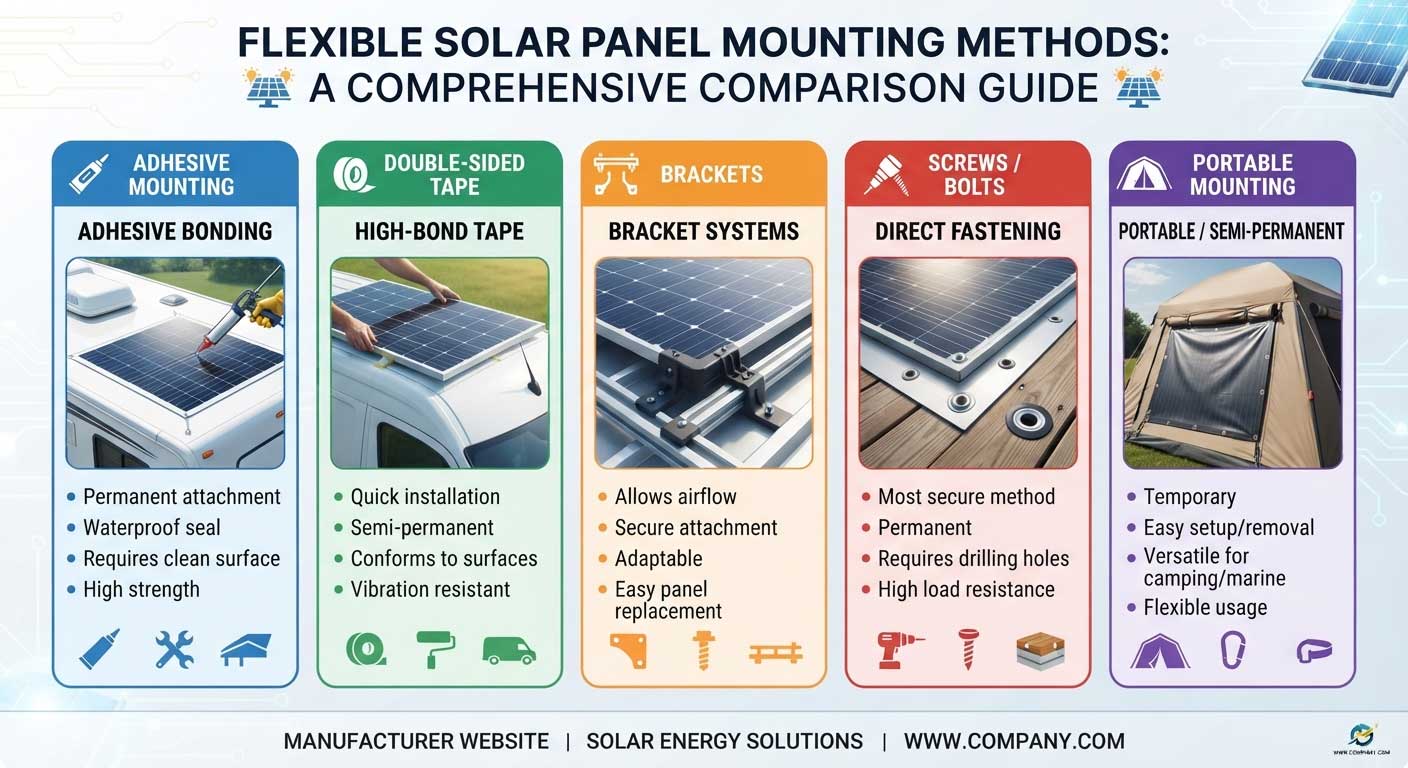
The most common installation methods include adhesive mounting, mounting tape, brackets, mechanical fixing, and portable mounting solutions.
1. Adhesive Mounting
Adhesive mounting is one of the most popular methods for flexible solar panels, especially for RVs, camper vans, and marine applications.
The panel is attached directly to the installation surface using a strong waterproof adhesive or sealant.
Advantages:
- Lightweight installation
- No drilling required
- Lower risk of roof damage
- Clean appearance
- Suitable for curved surfaces
This method is commonly used when maintaining the original structure of the vehicle or roof is important.
For example, many RV owners choose adhesive installation because it avoids creating additional holes in the roof, reducing potential water leakage problems.
However, adhesive selection is critical. A standard household adhesive may not withstand:
- UV exposure
- Temperature changes
- Outdoor vibration
- Moisture
For long-term outdoor use, professional-grade adhesives designed for automotive or marine environments are recommended.
Bright Solar recommends evaluating the installation environment before selecting adhesive solutions because different applications require different bonding strength and durability.
2. Double-Sided Mounting Tape
Heavy-duty mounting tape is another option for flexible solar panel installation, especially for lightweight panels and temporary applications.
High-quality industrial tapes provide strong bonding without permanent modifications to the mounting surface.
Advantages:
- Fast installation
- Easy application
- No curing time
- Easy removal compared with permanent adhesive
However, mounting tape has limitations.
It may not be suitable for:
- Large solar panels
- Extreme temperature environments
- Long-term heavy-duty installations
Before using tape, check:
- Maximum load capacity
- Temperature resistance
- Surface compatibility
For small flexible solar panels used on portable systems or lightweight applications, mounting tape can be a practical solution.
3. Bracket Mounting
Although flexible solar panels are often designed for adhesive installation, brackets can also be used in certain applications.
Bracket mounting provides a more secure mechanical connection and may improve airflow underneath the panel.
Advantages:
- Strong mechanical support
- Easier panel replacement
- Better ventilation
This method may be suitable for:
- Large RV solar systems
- Permanent installations
- Commercial vehicles
The disadvantage is that brackets usually add:
- Extra weight
- Additional components
- More installation complexity
For applications where maximum durability is required, mechanical mounting may be preferred.
4. Screw or Mechanical Fixing
Mechanical fixing uses screws, bolts, or other hardware to secure the solar panel.
This method provides strong attachment but requires careful waterproofing.
Advantages:
- Very strong connection
- Suitable for demanding environments
- Better resistance against vibration
Disadvantages:
- Requires drilling
- May damage mounting surfaces
- Requires sealing protection
For RV roofs, drilling should only be considered when necessary because improper sealing can lead to water leakage.
Professional installers usually combine mechanical fixing with waterproof sealants to protect the installation area.
5. Portable Mounting
Portable flexible solar panels use removable installation methods.
Common solutions include:
- Foldable supports
- Temporary brackets
- Velcro systems
- Adjustable stands
These systems are ideal for:
- Camping
- Emergency power
- Outdoor activities
The advantage is flexibility. Users can position the panel toward the sun and remove it when not needed.
The disadvantage is reduced security compared with permanent installation.
Flexible Solar Panel Mounting Method Comparison
| Installation Method | Advantages | Disadvantages | Best Application |
|---|---|---|---|
| Adhesive mounting | Lightweight, clean installation, no drilling | Permanent, requires good surface preparation | RV roofs, boats, vans |
| Mounting tape | Fast and simple | Lower strength for large panels | Small portable systems |
| Brackets | Strong support, better airflow | Adds weight and components | Large solar systems |
| Screws | Maximum mechanical strength | Requires drilling and sealing | Permanent installations |
| Portable mounting | Easy to remove and adjust | Less secure | Camping and temporary use |
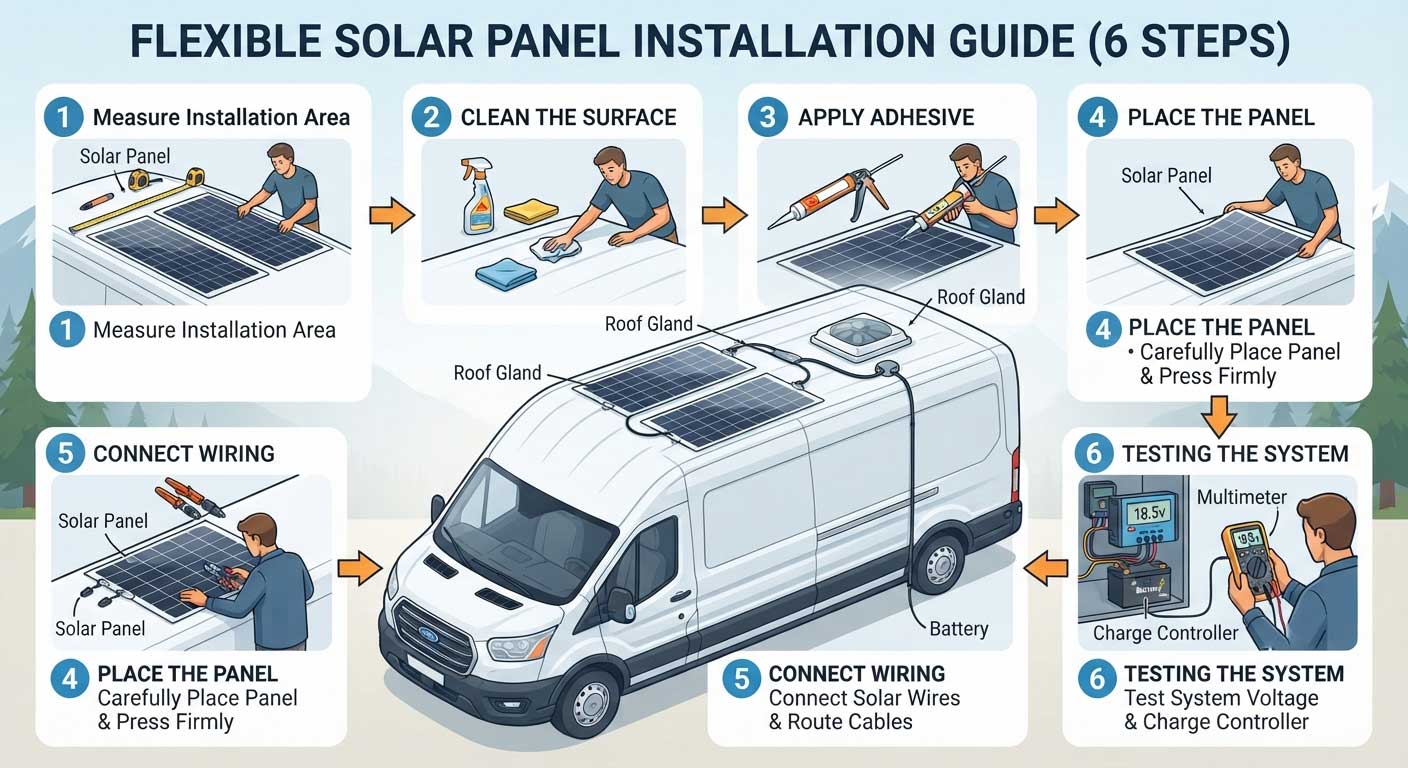
How to Install Flexible Solar Panels Step by Step
A proper flexible solar panel installation requires careful planning and attention to detail. Although flexible panels are easier to handle than rigid modules, installation mistakes can affect performance and reduce service life.
The following steps explain a reliable installation process for RVs, vehicles, boats, and other off-grid applications.
Step 1: Plan the Installation Location
Before attaching the flexible solar panel, determine the best installation position.
Consider:
Available Space
Measure the available area and confirm that the panel fits properly.
Avoid placing panels where they may interfere with:
- Roof vents
- Antennas
- Air conditioners
- Maintenance areas
Sun Exposure
Solar panels require direct sunlight to produce maximum energy.
Avoid locations affected by:
- Roof shadows
- Equipment obstruction
- Nearby structures
Even partial shading can reduce solar output.
Cable Route Planning
Plan the cable path before mounting.
A good cable layout should:
- Minimize cable length
- Avoid sharp bends
- Protect wires from damage
- Allow easy maintenance
This step is often overlooked but has a direct impact on system reliability.
Step 2: Clean and Prepare the Surface
Surface preparation is one of the most important steps in flexible solar panel installation.
The mounting surface should be completely clean before applying adhesive.
Recommended process:
Remove Dirt and Dust
Use a soft cloth or brush to remove loose particles.
Remove Oil and Contaminants
Clean the surface with an appropriate solvent such as isopropyl alcohol.
Oil or grease can significantly reduce adhesive strength.
Allow the Surface to Dry
Do not install the panel on a wet surface.
Moisture trapped between the panel and mounting surface may weaken bonding over time.
Step 3: Apply Adhesive or Mounting Material
The mounting material should be applied evenly across the installation area.
Important considerations:
- Avoid excessive adhesive thickness
- Prevent air pockets
- Ensure full contact between panel and surface
Uneven installation may create stress points that affect the solar cells.
For RV and vehicle applications, flexible adhesives are often preferred because they can handle vibration and temperature expansion.
Step 4: Position and Secure the Solar Panel
Carefully place the flexible solar panel onto the prepared surface.
During installation:
- Align the panel correctly before pressing down
- Avoid folding or sharp bending
- Apply even pressure across the surface
Once attached, allow sufficient curing time if adhesive is used.
Do not immediately expose the installation to heavy rain or mechanical stress before the adhesive fully bonds.
Step 5: Connect the Electrical System
After the panel is mechanically installed, connect the electrical components.
A typical connection sequence is:
Flexible Solar Panel → Charge Controller → Battery → Inverter → Appliances
Check:
- Correct polarity
- Secure connectors
- Waterproof cable protection
For outdoor applications, electrical connections should be protected from:
- Rain
- Dust
- UV exposure
- Mechanical movement
Step 6: Test the Solar System
After completing installation, test the system before regular use.
Check:
- Open circuit voltage
- Charging current
- Battery charging status
- Controller operation
A multimeter can help confirm whether the panel is producing the expected output.
If performance is lower than expected, inspect:
- Shading
- Cable connections
- Panel positioning
- Installation quality
A carefully planned installation allows flexible solar panels to deliver stable performance for years. Bright Solar recommends focusing on both mechanical attachment and electrical protection because reliable solar performance depends on the complete system, not only the panel itself.
How to Install Flexible Solar Panels on an RV Roof
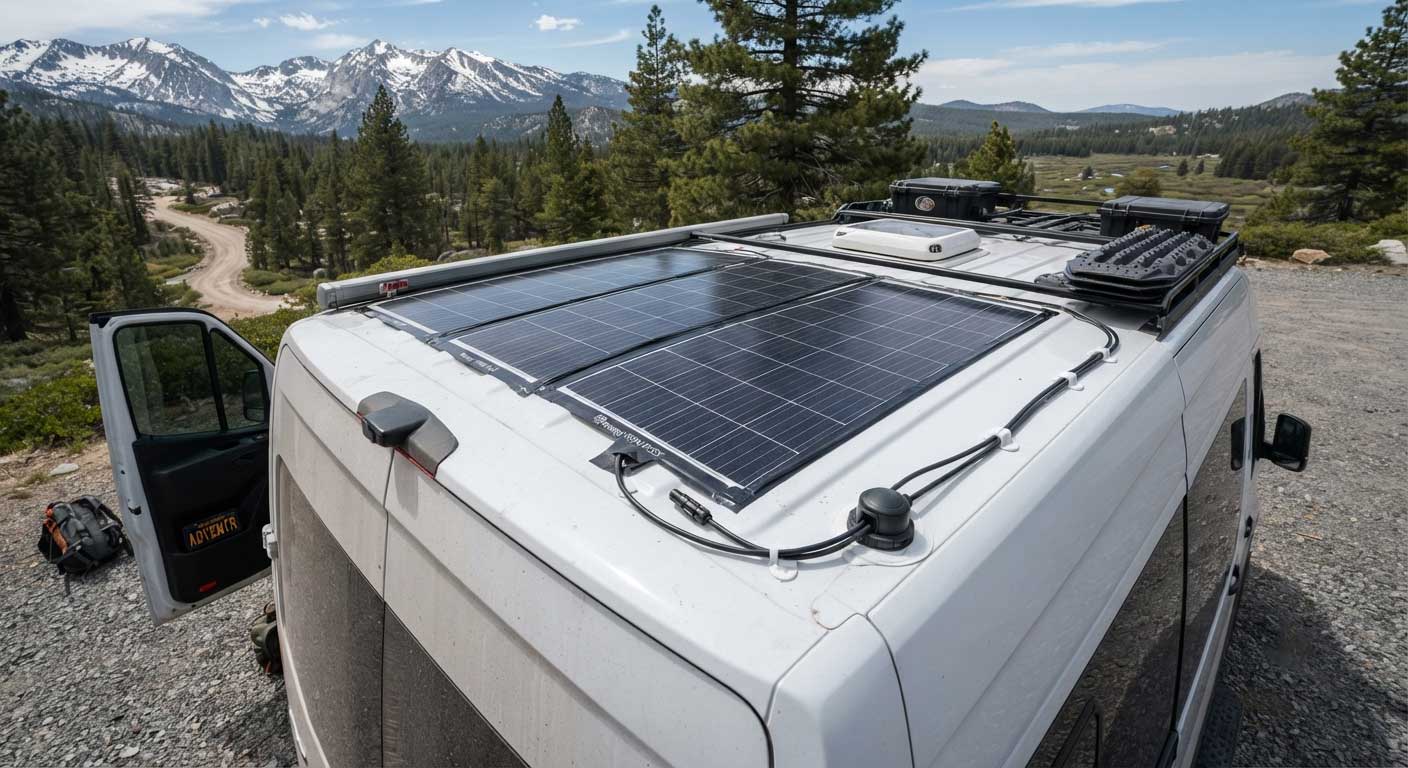
Installing flexible solar panels on an RV roof is one of the most common applications because RV owners need lightweight, low-profile, and reliable power solutions for off-grid travel.
Compared with rigid solar panels, flexible panels can better adapt to curved RV roofs and usually require fewer mounting components. However, RV environments create unique challenges, including vibration, weather exposure, limited roof space, and temperature changes.
A successful RV flexible solar panel installation should focus on three key areas:
- Strong attachment
- Waterproof protection
- Safe electrical connection
Step 1: Inspect the RV Roof Condition
Before installation, inspect the roof carefully.
Check:
- Roof material
- Existing damage
- Sealing condition
- Available installation area
Do not install flexible solar panels on damaged or unstable surfaces. Cracks, loose coatings, or aging sealants should be repaired before mounting.
Common RV roof materials include:
- Fiberglass
- Aluminum
- TPO membrane
- EPDM rubber
Different materials may require different cleaning methods and adhesive solutions.
Step 2: Select the Best Panel Location
The ideal RV solar panel location should provide maximum sunlight exposure while avoiding obstacles.
Avoid installing panels near:
- Air conditioners
- Roof vents
- Satellite antennas
- Roof racks
Even small shadows can reduce solar output because photovoltaic cells are connected in series.
Before final mounting, place the flexible solar panel on the roof temporarily and check:
- Available space
- Cable direction
- Shading conditions
- Maintenance accessibility
Step 3: Prepare the RV Roof Surface
Proper preparation is essential for long-term adhesion.
Recommended steps:
Clean the Roof
Remove:
- Dust
- Dirt
- Oil
- Wax
- Old adhesive residue
A clean surface creates stronger bonding between the panel and roof.
Dry Completely
The roof must be completely dry before installation.
Installing on a damp surface may cause:
- Weak adhesion
- Moisture trapping
- Premature failure
Mark the Installation Area
Use removable markers to outline the panel position.
This helps ensure accurate placement during adhesive installation.
Step 4: Attach the Flexible Solar Panel
Most RV flexible solar panels are installed using adhesive because it provides a low-profile and lightweight solution.
The general process:
- Apply compatible adhesive or mounting material
- Position the panel carefully
- Press evenly across the surface
- Remove air gaps
- Allow proper curing time
Avoid pulling or stretching the panel during installation.
Flexible solar panels can bend, but excessive mechanical stress may damage internal solar cells.
Step 5: Route and Protect Solar Cables
Cable management is an important part of RV solar installation.
Poor cable routing may lead to:
- Water leaks
- Cable damage
- Power loss
Recommended practices:
- Keep cables away from sharp edges
- Secure loose sections
- Use waterproof cable glands
- Protect exposed wiring from UV damage
For RV applications, cable entry points should always be properly sealed to prevent roof leaks.
Step 6: Connect the RV Solar System
A typical RV solar system includes:
Flexible Solar Panel → MPPT Charge Controller → Battery Bank → Inverter → RV Appliances
The charge controller regulates the electricity produced by the panel and protects the battery system.
Common RV components include:
- Lithium batteries
- Battery monitors
- DC appliances
- Power inverters
Before connecting the system, confirm:
- Correct voltage compatibility
- Correct cable polarity
- Secure electrical connections
How to Install Flexible Solar Panels Without Drilling
One of the biggest advantages of flexible solar panels is the ability to install them without drilling holes into the mounting surface.
This is especially valuable for:
- RV roofs
- Camper vans
- Boats
- Rental vehicles
A no-drill installation reduces structural modification and lowers the risk of water leakage.
Adhesive Installation Method
Adhesive mounting is the most common no-drill installation method.
Benefits include:
- Simple installation
- Lightweight design
- Clean appearance
- Reduced roof damage risk
However, the adhesive must be suitable for outdoor applications.
A proper adhesive should resist:
- UV radiation
- Rain
- Temperature changes
- Vehicle vibration
Industrial Mounting Tape Method
Heavy-duty mounting tape can also be used for lightweight flexible panels.
Advantages:
- Quick installation
- No curing time
- Easy application
However, it is important to check:
- Tape strength
- Temperature resistance
- Surface compatibility
For permanent RV installations, professional-grade adhesive solutions are usually more reliable.
When Should You Avoid No-Drill Installation?
Although no-drill installation works well for many applications, it may not be suitable for every situation.
Avoid relying only on adhesive when:
- The panel is very large
- The installation area experiences extreme vibration
- The surface condition is poor
- The environment has severe weather exposure
In demanding applications, additional mechanical support may be required.
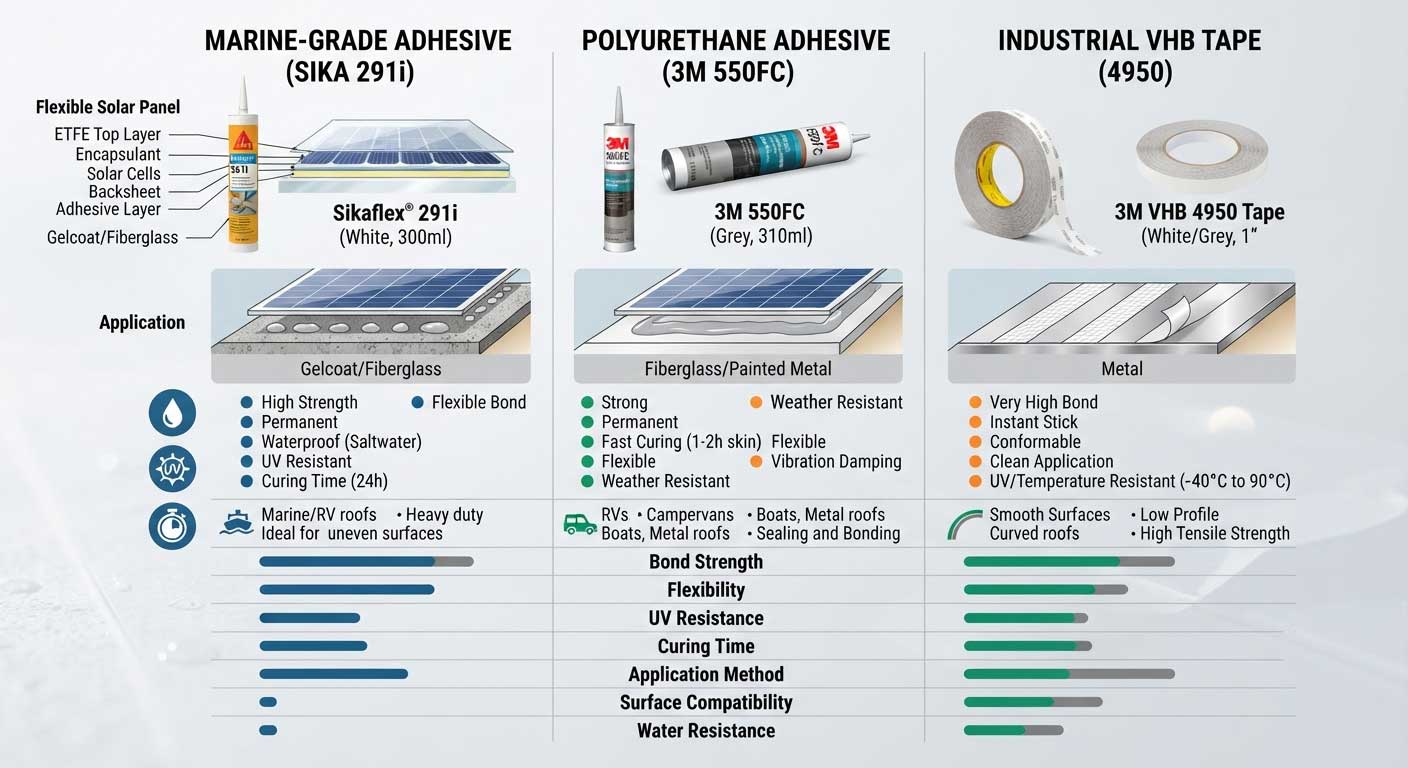
Best Adhesive for Flexible Solar Panel Installation
Choosing the right adhesive is critical because the mounting material directly affects installation reliability.
A flexible solar panel must remain attached while handling:
- Heat expansion
- Vehicle vibration
- Wind pressure
- Moisture exposure
The best adhesive depends on the installation environment.
1. Marine-Grade Adhesive
Marine adhesives are commonly used for flexible solar panel installation because they are designed for outdoor and waterproof applications.
Advantages:
- Excellent moisture resistance
- Good flexibility
- Strong bonding performance
Suitable applications:
- Boats
- RV roofs
- Outdoor vehicles
2. Polyurethane Adhesive
Polyurethane adhesives provide strong bonding while maintaining flexibility.
They work well when the mounting surface experiences movement or vibration.
Advantages:
- Strong adhesion
- Weather resistance
- Flexible after curing
Common applications:
- RVs
- Trucks
- Industrial vehicles
3. Industrial VHB Mounting Tape
VHB tape is widely used in lightweight solar installations.
Advantages:
- Fast installation
- Clean appearance
- No curing time
Limitations:
- Lower performance under extreme conditions
- Requires excellent surface preparation
Adhesive Selection Tips
Before choosing an adhesive, consider:
Surface Material
Different surfaces require different bonding characteristics.
Examples:
- Fiberglass
- Aluminum
- Plastic
- Composite materials
Environmental Conditions
Consider:
- Temperature range
- Rain exposure
- UV intensity
- Vehicle vibration
Panel Size and Weight
Larger flexible solar panels require stronger attachment methods.
A small portable panel and a permanent RV solar system should not use the same mounting approach.
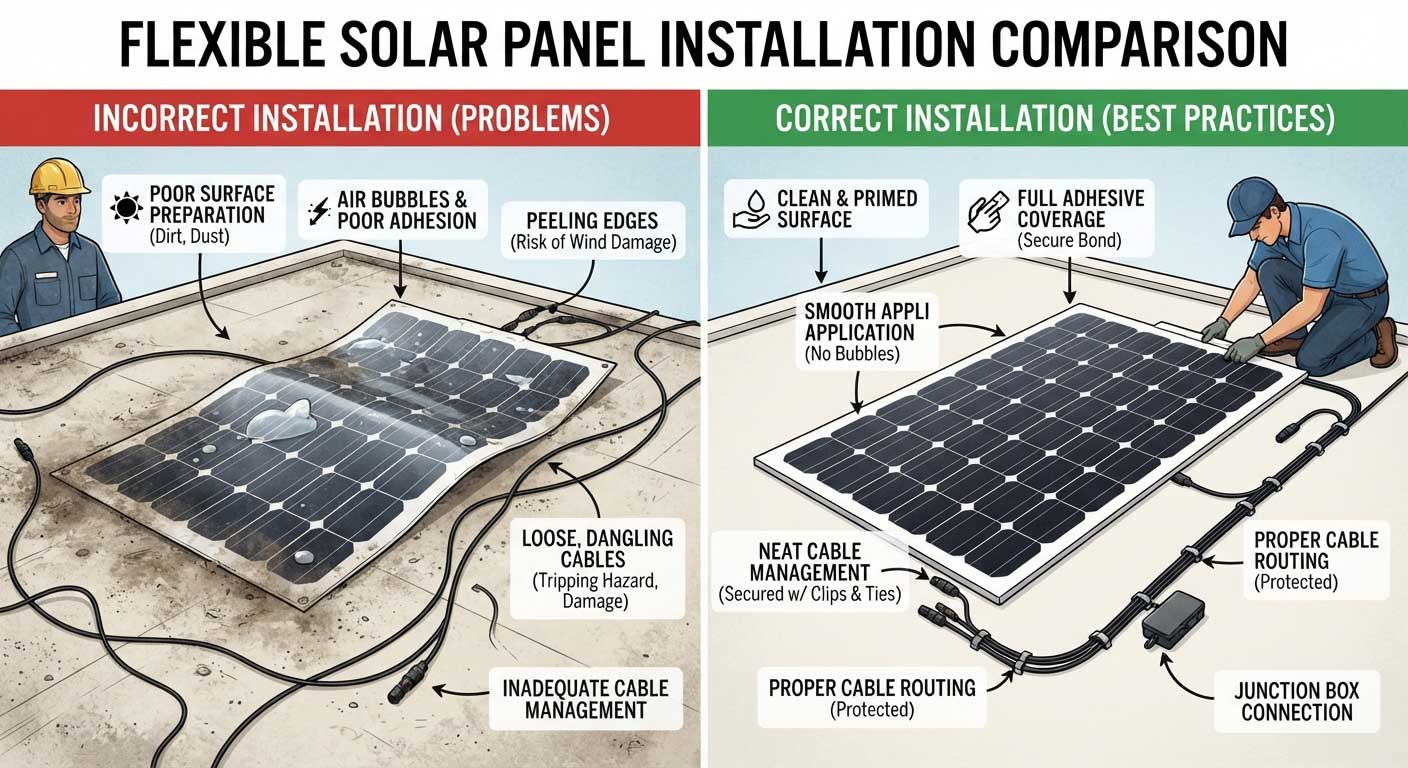
Common Flexible Solar Panel Installation Mistakes
Many flexible solar panel problems are caused by installation mistakes rather than product quality.
Understanding common errors helps improve system reliability and lifespan.
Mistake 1: Installing on a Dirty Surface
One of the most common failures is poor surface preparation.
Dust, grease, or moisture can prevent proper bonding.
Solution:
Always clean and dry the installation surface before mounting.
Mistake 2: Using the Wrong Adhesive
Not every adhesive is designed for outdoor solar applications.
Common problems:
- Weak bonding
- Cracking
- Water penetration
Solution:
Choose adhesives designed for automotive, marine, or outdoor environments.
Mistake 3: Over-Bending the Solar Panel
Flexible does not mean unlimited bending.
Excessive bending can damage:
- Solar cells
- Internal connections
- Protective layers
Solution:
Follow the manufacturer’s bending specifications.
Mistake 4: Ignoring Heat Expansion
Materials expand and contract with temperature changes.
A rigid mounting method may create unnecessary stress.
Solution:
Use flexible bonding materials that can handle movement.
Mistake 5: Poor Cable Waterproofing
Electrical problems often occur because cables are not properly protected.
Common issues:
- Water entering connectors
- UV damage
- Loose connections
Solution:
Use waterproof connectors and secure cable routing.
Proper flexible solar panel installation requires attention to both mechanical and electrical details. At Bright Solar, we recommend treating installation as a complete system process rather than only a mounting task. Correct preparation, suitable materials, and careful wiring help maximize solar performance and service life.
How to Maintain Flexible Solar Panels After Installation
Proper maintenance helps flexible solar panels maintain stable power output and extends their service life. Although flexible solar panels are designed for outdoor environments, they are continuously exposed to sunlight, dust, rain, temperature changes, and mechanical vibration.
A regular inspection routine can help identify small problems before they affect system performance.
The main maintenance tasks include:
- Cleaning the panel surface
- Checking electrical connections
- Inspecting mounting conditions
- Monitoring solar output
Clean the Solar Panel Surface Regularly
Dust, bird droppings, leaves, and other debris can block sunlight and reduce energy production.
The cleaning frequency depends on the installation environment.
For example:
- Desert areas may require more frequent cleaning due to dust accumulation.
- Coastal areas may need regular cleaning because of salt deposits.
- Forest camping areas may collect leaves and organic debris.
Recommended cleaning method:
- Use clean water to remove loose dirt.
- Wipe gently with a soft cloth or sponge.
- Avoid abrasive materials that may scratch the protective coating.
- Allow the panel to dry naturally.
Do not use harsh chemicals unless they are approved for solar panel surfaces.
For flexible solar panels with ETFE coatings, regular gentle cleaning helps maintain light transmission and long-term durability.
Inspect Adhesive and Mounting Conditions
The mounting connection should be checked periodically, especially for mobile applications such as RVs and vehicles.
Inspect for:
- Edge lifting
- Loose sections
- Cracked adhesive
- Surface separation
Vehicle vibration and repeated temperature changes can gradually affect the bonding area.
If any part of the panel begins separating from the surface, repair it as soon as possible to prevent further damage.
Check Electrical Connections
Electrical inspections are essential for maintaining reliable solar performance.
Check:
- MC4 connectors
- Cable insulation
- Junction boxes
- Charge controller connections
Look for signs of:
- Corrosion
- Water damage
- Loose connections
- Cable wear
For outdoor installations, waterproof protection should always be maintained.
Monitor Solar System Performance
A sudden decrease in power output may indicate a problem.
Possible causes include:
- Dirt accumulation
- Shading
- Loose connections
- Damaged solar cells
- Battery system issues
Using a solar monitoring system or battery monitor makes it easier to identify performance changes.
How Long Does Flexible Solar Panel Installation Last?
The lifespan of a flexible solar panel installation depends on the quality of the panel, mounting method, environment, and maintenance.
A properly installed high-quality flexible solar system can typically provide reliable performance for many years.
However, flexible panels experience unique conditions compared with stationary rooftop systems because they are often installed on moving platforms such as RVs, boats, and vehicles.
Factors Affecting Installation Lifespan
1. Solar Panel Material Quality
The materials used in flexible solar panels have a direct impact on durability.
Important features include:
- ETFE protective coating
- High-quality photovoltaic cells
- Strong encapsulation
- Waterproof junction boxes
Premium materials help protect the panel from:
- UV radiation
- Moisture
- Temperature changes
- Physical impact
Bright Solar uses durable materials and manufacturing processes designed for outdoor solar applications where reliability is critical.
2. Installation Method
The mounting method directly affects long-term performance.
A properly selected installation method should match the application.
Examples:
- RV roof: lightweight adhesive mounting
- Marine applications: waterproof bonding solutions
- Permanent systems: additional mechanical support if required
Using an unsuitable mounting method may shorten the system lifespan.
3. Environmental Conditions
Flexible solar panels installed in harsh environments experience greater stress.
Important environmental factors include:
- High temperatures
- Strong sunlight
- Heavy rain
- Saltwater exposure
- Frequent vibration
For example, a solar panel installed on a coastal boat requires stronger corrosion protection compared with a panel installed on a camper used occasionally.
How to Choose a Reliable Flexible Solar Panel for Installation
Before starting a flexible solar panel installation project, selecting the right panel is just as important as choosing the correct mounting method.
A suitable flexible solar panel should match your:
- Energy requirements
- Installation surface
- Environmental conditions
- Long-term usage plans
Choose the Right Power Rating
Solar panel wattage determines how much energy the system can generate.
Common options include:
100W Flexible Solar Panels
Suitable for:
- Small campers
- Portable power
- Basic battery charging
200W–400W Flexible Solar Panels
Suitable for:
- RVs
- Camper vans
- Medium off-grid systems
These sizes provide a good balance between installation space and energy output.
500W+ Flexible Solar Systems
Suitable for:
- Full-time RV living
- Large battery systems
- Higher electricity demand
The correct system size should be based on actual energy consumption rather than simply choosing the highest wattage available.
Consider Solar Panel Surface Material
The surface coating affects durability and outdoor performance.
Common materials include:
ETFE Coating
Advantages:
- Strong UV resistance
- Better scratch protection
- High transparency
- Long outdoor durability
PET Coating
Advantages:
- Lower cost
- Lightweight
However, premium outdoor applications often prefer ETFE because it provides better protection under continuous sunlight exposure.
Check Waterproof and Safety Features
For flexible solar panel installation, waterproof protection is essential.
Look for:
- Sealed junction boxes
- Waterproof connectors
- Reliable encapsulation
- Weather-resistant cables
These features help maintain stable operation in outdoor environments.
FAQ About Flexible Solar Panel Installation
Can you install flexible solar panels yourself?
Yes. Many flexible solar panel installations can be completed as DIY projects, especially smaller RV and portable systems.
However, proper preparation is important. Incorrect adhesive selection, poor wiring, or improper waterproofing can reduce performance and shorten lifespan.
For larger systems, professional installation is recommended.
How do you attach flexible solar panels?
Flexible solar panels can be attached using:
- Industrial adhesive
- Marine-grade sealant
- Mounting tape
- Brackets
- Mechanical fixing methods
The best method depends on the installation location, panel size, and environmental conditions.
Can flexible solar panels be installed on an RV roof?
Yes. RV roofs are one of the most common applications for flexible solar panels.
They are suitable because they are:
- Lightweight
- Low profile
- Compatible with curved surfaces
Proper roof preparation and waterproof cable routing are essential for long-term performance.
Do flexible solar panels need an air gap?
Most flexible solar panels are installed directly on the mounting surface and do not require an air gap.
However, heat management should still be considered because higher temperatures can reduce solar efficiency.
Installation location and panel material quality play an important role.
Can flexible solar panels be screwed down?
Yes, flexible solar panels can be mechanically fixed in some applications, but drilling should be carefully considered.
For RV roofs and vehicles, adhesive mounting is often preferred because it avoids unnecessary holes and reduces leak risks.
What adhesive is best for flexible solar panels?
The best adhesive depends on the installation environment.
Common choices include:
- Marine-grade adhesive
- Polyurethane adhesive
- Industrial mounting tape
The adhesive should provide strong bonding, waterproof protection, and resistance to temperature changes.
how do flexible solar panels work?
Flexible solar panels work by converting sunlight into direct current (DC) electricity through photovoltaic cells mounted on thin, bendable layers instead of rigid glass. They are lighter than traditional panels, easier to mount on curved surfaces, and widely used on RVs, vans, boats, and off-grid systems where weight and flexibility matter.Learn more about “how do flexible solar panels work“
How to Install Flexible Solar Panels?
Flexible solar panels should be installed on a clean, stable, low-heat surface using marine-grade adhesive, screws, or hybrid mounting methods. Correct cable routing, ventilation spacing, and waterproof sealing are critical. A poor installation usually shortens panel lifespan faster than weather exposure itself.Learn more about “How to Install Flexible Solar Panels“
How to Install Flexible Solar Panels on RV?
Flexible solar panels on an RV are usually installed using industrial adhesive, VHB tape, or low-profile mounting hardware combined with waterproof cable routing and proper roof preparation. The key is controlling heat buildup and ensuring the roof remains watertight during years of travel.Learn more about “How to Install Flexible Solar Panels on RV“
How to Install Flexible Solar Panels on RV Roof?
Flexible solar panels are installed on RV roofs using industrial adhesive, proper surface preparation, safe cable routing, and airflow spacing. A well-installed flexible panel can power RV appliances for years without drilling large mounting brackets into the roof.Learn more about “How to Install Flexible Solar Panels on RV Roof“
How to Install Flexible Solar Panels on Van?
Flexible solar panels are installed on vans using industrial adhesive, waterproof cable routing, careful roof preparation, and proper electrical connections. A correctly installed system can provide reliable off-grid power for years without adding heavy roof racks.Learn more about “How to Install Flexible Solar Panels on Van“
How to Install Flexible Solar Panels on Van Roof?
To install flexible solar panels on a van roof, clean the roof thoroughly, position panels away from shadows and roof accessories, bond them using a suitable adhesive, route cables through a waterproof entry gland, and connect them to a charge controller and battery system. Proper surface preparation and cable management are just as important as the solar panels themselves.Learn more about “How to Install Flexible Solar Panels on Van Roof“
How to Install Flexible Solar Panels to Rubber RV Roof?
To install flexible solar panels to a rubber RV roof, thoroughly clean the membrane surface, position the panel away from roof obstructions, use a compatible adhesive approved for EPDM or TPO roofing, route cables through waterproof glands, and connect the system to a charge controller and battery bank. Proper surface preparation is often more important than the adhesive itself.Learn more about “How to Install Flexible Solar Panels to Rubber RV Roof“
How to Install Flexible Solar Panels to TPO Roof?
Flexible solar panels can be installed on TPO roofs using compatible adhesives, proper surface preparation, and controlled mounting pressure. The key is preventing heat buildup and ensuring the adhesive bonds safely with the TPO membrane without damaging the roof.Learn more about “How to Install Flexible Solar Panels to TPO Roof“
How to attach flexible solar panel to RV roof?
To attach a flexible solar panel to an RV roof, clean the roof thoroughly, position the panel with airflow clearance, secure it using industrial adhesive or VHB tape, seal cable entry points with waterproof sealant, and connect the panel to a charge controller before testing system output.Learn more about “How to attach flexible solar panel to RV roof“
How to Mount Flexible Solar Panel?
Flexible solar panels are usually mounted using industrial adhesive, VHB tape, screws with spacers, or hybrid mounting systems. The safest installation keeps airflow under the panel, prevents water buildup, and avoids over-bending the panel surface. Done correctly, a flexible solar panel can stay securely mounted for 5–10 years on RVs, vans, boats, and curved roofs.Learn more about “How to Mount Flexible Solar Panel“
How to Clean Flexible Solar Panels?
Flexible solar panels should be cleaned using soft water, a non-abrasive sponge, and mild soap while avoiding harsh chemicals, pressure washers, or stiff brushes. Regular cleaning improves energy output, prevents surface degradation, and helps flexible panels last significantly longer in outdoor conditions.Learn more about “How to Clean Flexible Solar Panels“
Conclusion: Choosing the Right Flexible Solar Panel Installation Method
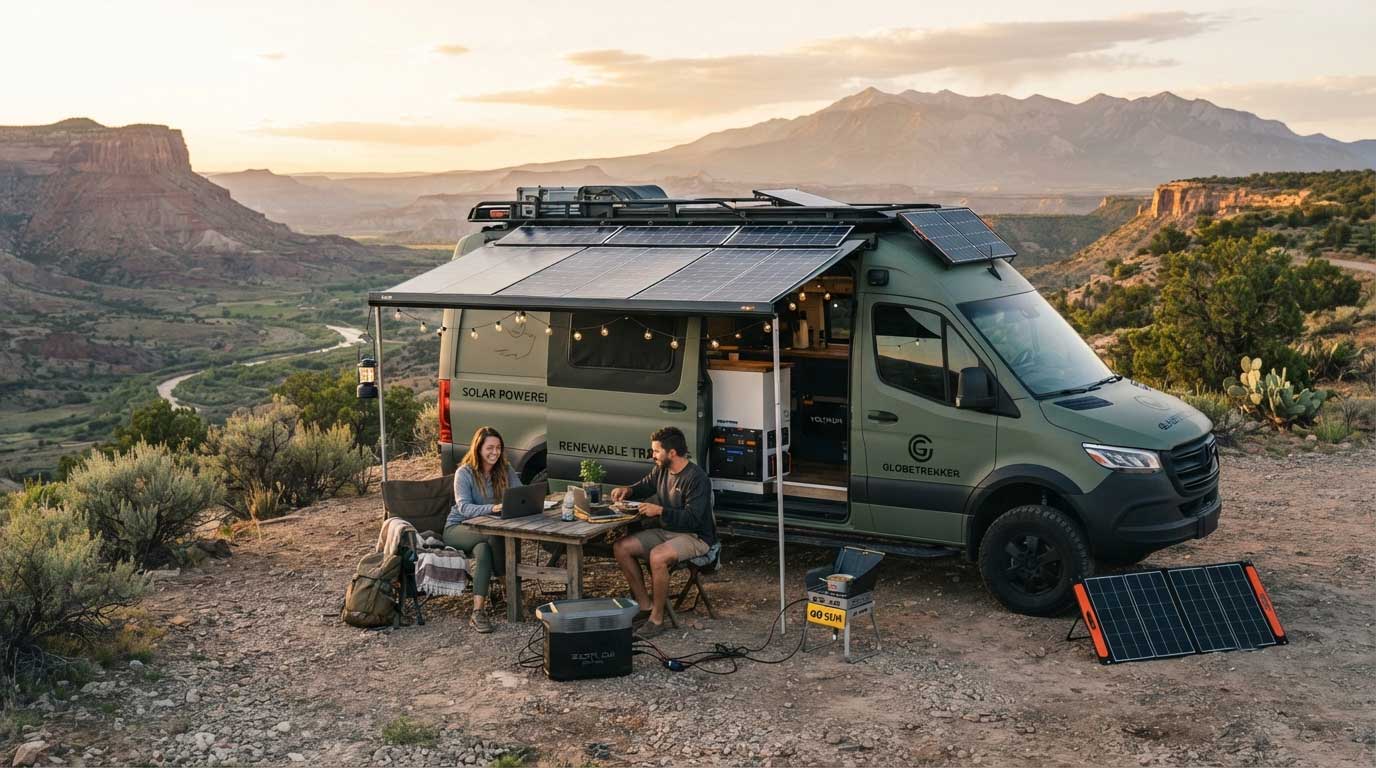
Flexible solar panel installation is a practical solution for RVs, camper vans, boats, vehicles, and other applications where lightweight and adaptable solar power is required.
A successful installation depends on more than attaching the panel. Proper surface preparation, suitable mounting materials, correct wiring, and regular maintenance all contribute to long-term performance.
Compared with traditional solar installations, flexible panels provide advantages such as:
- Lightweight construction
- Low-profile design
- Easier installation
- Better compatibility with curved surfaces
However, choosing the right installation method is essential to avoid problems such as poor adhesion, overheating, or electrical issues.
At Bright Solar, we focus on developing reliable flexible solar solutions that meet the needs of modern mobile and off-grid energy applications. By combining quality materials with proper installation practices, flexible solar panels can provide dependable renewable power for years.
Whether you are upgrading an RV, building a camper system, or creating a custom solar solution, a correctly installed flexible solar panel system can help you achieve cleaner, quieter, and more independent energy.
Related recommendations
-

Marine Flexible Solar Panels: Lightweight Solar Power Solutions for Boats and Yachts
286Marine flexible solar panels provide lightweight solar power for boats, yachts, and offshore systems. Explore installation methods, durability, and real marine applications.
View details -
flexible solar panels 100w: Lightweight Solar Solution for Portable Energy Applications
224Discover flexible solar panels 100w from Bright Solar with lightweight design, high efficiency, and durable ETFE protection for RV, marine, camping, and off-grid energy.
View details -
400 Watt Solar Panel: Real Performance, Efficiency, and Buying Guide
373400 watt solar panel systems deliver reliable off-grid and residential power. Learn efficiency, output, installation tips, and real-world performance.
View details -
300W Flexible Solar Panels for Reliable Off-Grid Power
230Explore how 300W flexible solar panels deliver lightweight, reliable off-grid power for RVs, boats, camper vans, and portable solar systems.
View details