Flexible Adhesive Solar Panels: Uses, Mounting and Buying Guide
Flexible adhesive solar panels are photovoltaic modules designed for applications where a low-profile installation and a compatible bonding method may be useful. They can be considered for selected RV roofs, campervans, boats, and off-grid projects, but the panel, adhesive, and mounting surface must all be compatible. Correct surface preparation, thermal movement, wiring, and manufacturer instructions are essential.
Adhesive mounting can simplify the appearance of a solar installation by reducing the need for conventional brackets. It is not, however, a universal solution: roof materials differ, surfaces expand and contract, and not every flexible module is approved for adhesive attachment. The right approach is to treat the panel and its mounting system as one engineered installation.
What Are Flexible Adhesive Solar Panels?
Flexible adhesive solar panels are photovoltaic modules intended to be installed using an approved adhesive or bonding system, rather than—or in some designs alongside—mechanical fasteners. The term describes an installation approach as much as a panel category. A flexible panel is not automatically adhesive-backed, and an adhesive-backed module is not necessarily suitable for every roof or surface.
The module converts sunlight into DC electricity. Its flexible construction may allow limited bending within the manufacturer’s stated limits. Adhesive mounting, when explicitly supported by the product documentation, can help create a low-profile installation on a compatible surface.
Flexible does not mean foldable
The amount of bending a module can tolerate is product-specific. Do not fold, crease, roll, or repeatedly flex a panel unless its manufacturer expressly permits that handling. Even a module intended for curved surfaces can be damaged by an excessively tight radius, uneven support, or stress concentrated at an edge.
Adhesive mounting does not mean “stick it anywhere”
A successful bond depends on several factors:
- The panel’s approved mounting method.
- The surface material, coating, texture, and condition.
- Adhesive compatibility with both the module and substrate.
- Surface preparation and application conditions.
- Temperature, moisture, vibration, and expected movement.
- The manufacturer’s curing, inspection, and maintenance instructions.
A generic construction adhesive should not be substituted for a specified bonding system without approval. A bond that appears secure immediately after installation may not have reached its required cure state or may not tolerate long-term outdoor exposure.
How Adhesive-Mounted Flexible Solar Panels Work
The photovoltaic process is the same basic process used by other solar modules: cells convert incoming light into electrical energy. The distinctive feature is how the module is integrated with the mounting surface.
With a compatible adhesive installation, the bonding layer holds the panel in position and transfers mechanical loads to the substrate. That makes the substrate an important part of the design. A roof coating that is peeling, chalky, oily, cracked, or poorly bonded may not provide a dependable surface, even if the adhesive itself is suitable.
The installation also needs to account for temperature changes. Roofs and panels can expand and contract at different rates. A bonding method must be approved for the materials and conditions involved; otherwise, stress can accumulate at the perimeter or across the panel.
For photovoltaic performance, standardized ratings provide a common comparison point, but they do not describe every real-world operating condition. The U.S. Department of Energy’s solar resources explain how photovoltaic systems work and why field production depends on factors beyond nominal module power. Solar Photovoltaic Technology Basics
Benefits and Limitations of Adhesive Mounting
Adhesive mounting can be useful, but its advantages depend on the surface and the approved installation method.
Potential benefits
- Low-profile appearance: An approved bonding method may avoid bulky brackets.
- Flexible layout options: Some modules can be fitted to gently curved surfaces within their specified limits.
- Fewer roof penetrations: Depending on the system design, bonding may reduce or avoid drilled mounting holes.
- Useful for space-constrained projects: A panel may fit an area that cannot easily accommodate a conventional framed module.
- Simplified visual integration: A low-profile installation can be desirable on certain vehicles and vessels.
These are potential installation benefits, not guarantees. A panel’s weight, construction, and mounting instructions determine which benefits actually apply.
Important limitations
| Limitation | What it means for the installer |
|---|---|
| Surface compatibility | The substrate must be suitable for the specified adhesive and remain structurally sound. |
| Difficult removal | Bonded panels may be harder to remove without damaging the panel or surface. |
| Temperature and movement | The bond must tolerate the conditions and material movement expected in service. |
| Limited repair access | A bonded installation can make inspection or replacement more involved. |
| Product-specific requirements | Adhesive type, coverage, surface preparation, and curing cannot be guessed. |
| Heat management | A low-profile installation may affect airflow around the module; follow manufacturer guidance. |
An installation that avoids drilling is not automatically safer or more durable. If a roof coating fails beneath the adhesive, the bond may remain attached to the coating while the coating separates from the roof. That is why substrate condition matters just as much as adhesive selection.
How to Install Flexible Adhesive Solar Panels
The following workflow is a general planning guide. It does not replace the instructions for the exact panel, adhesive, roof material, or vehicle. If the product documentation does not approve adhesive mounting, do not assume that bonding is acceptable.
Step 1 — Confirm that adhesive mounting is approved
Check the module datasheet and installation manual. Identify the approved bonding product or system, surface requirements, application temperature, curing time, and any restrictions on panel placement.
If the instructions are unclear, obtain written clarification from the manufacturer before installation.
Step 2 — Inspect the substrate
Look closely at the proposed surface. Check for:
- Peeling paint or roof coatings.
- Oxidation, corrosion, cracks, or delamination.
- Dust, grease, wax, polish, or other contaminants.
- Raised seams, sharp edges, and uneven areas.
- Water traps or locations exposed to persistent pooling.
- Roof sections that flex independently under load.
A clean-looking surface is not necessarily a sound bonding surface. If the coating is loose or the substrate is damaged, resolve that issue before proceeding.
Step 3 — Prepare the surface as specified
Use only the cleaning and preparation process approved for the substrate and adhesive. Do not assume that a solvent suitable for metal is safe for a painted composite roof or plastic surface. Allow the surface to dry as instructed.
Mark the panel outline before applying adhesive. Dry-positioning helps reveal clashes with roof fittings and gives the installer a chance to check cable routing without rushing during the bonding stage.
Step 4 — Apply the approved bonding system
Follow the adhesive manufacturer’s instructions for bead pattern, coverage, thickness, pressure, and working time. Avoid improvised application patterns or unapproved tapes.
Do not stretch the panel to force it into position. The module should sit within its specified mechanical limits, with no sharp crease or concentrated stress at the edges.
Step 5 — Allow the required cure and inspect
Respect the stated curing conditions before exposing the installation to movement, water, or other service loads. “Touch dry” and fully cured are not necessarily the same thing.
After installation, inspect the perimeter and cable route. Look for lifting edges, gaps, contamination, or signs that the panel has shifted. Follow the prescribed inspection schedule rather than waiting for a visible failure.
Step 6 — Complete the electrical checks
Before connecting the panel, verify its Voc, Isc, Vmp, and Imp against the charge controller and the rest of the system. Check polarity, connector compatibility, cable protection, and any required overcurrent protection.
For battery systems, configure the controller for the battery manufacturer’s requirements. Use a qualified installer where local rules require one or where the work involves unfamiliar high-current DC equipment.
The general importance of following a defined installation procedure is reflected in flexible-panel installation guidance, which emphasizes preparing and drying the surface, checking obstructions, using an appropriate mounting approach, and allowing the bonding system to cure according to its instructions.

Estimating Output from Flexible Adhesive Solar Panels
Adhesive mounting does not change the basic meaning of a panel’s rated power. A module rated at a given wattage is measured under specified test conditions, while the energy it generates over a day depends on sunlight and operating conditions.
A simple preliminary estimate is:
Daily energy (Wh) = rated power (W) × equivalent peak-sun-hours × assumed system factor
For example, a hypothetical 200W module receiving 4 equivalent peak-sun-hours, with an illustrative system factor of 0.8, would give:
200W × 4 hours × 0.8 = 640Wh (0.64kWh)
This is an example calculation only. The 200W rating, 4 peak-sun-hours, and 0.8 factor are illustrative inputs—not a Bright Solar product specification or a site-specific prediction.
For an actual project, use the module’s datasheet and local solar-resource information. NLR’s PVWatts calculator estimates energy production for grid-connected PV systems and cautions that its predictions include assumptions and uncertainties. Its standard model may not represent all technology differences or site-specific characteristics unless those are reflected in the inputs.
Why a low-profile installation still needs performance checks
A panel mounted close to a roof may experience different airflow and temperature conditions from a panel mounted on an open rack. Shading from roof accessories can also be more significant than it appears in a quick visual inspection.
When reviewing output data, record:
- Date and approximate time.
- Weather and visible shading.
- Panel orientation and mounting arrangement.
- Battery state and controller operating conditions.
- Relevant voltage and current readings.
This record helps avoid comparing measurements taken under very different conditions.
A Practical Planning Example for an RV Solar Upgrade
The following is a hypothetical project scenario, not a verified Bright Solar customer case or a measured field result.
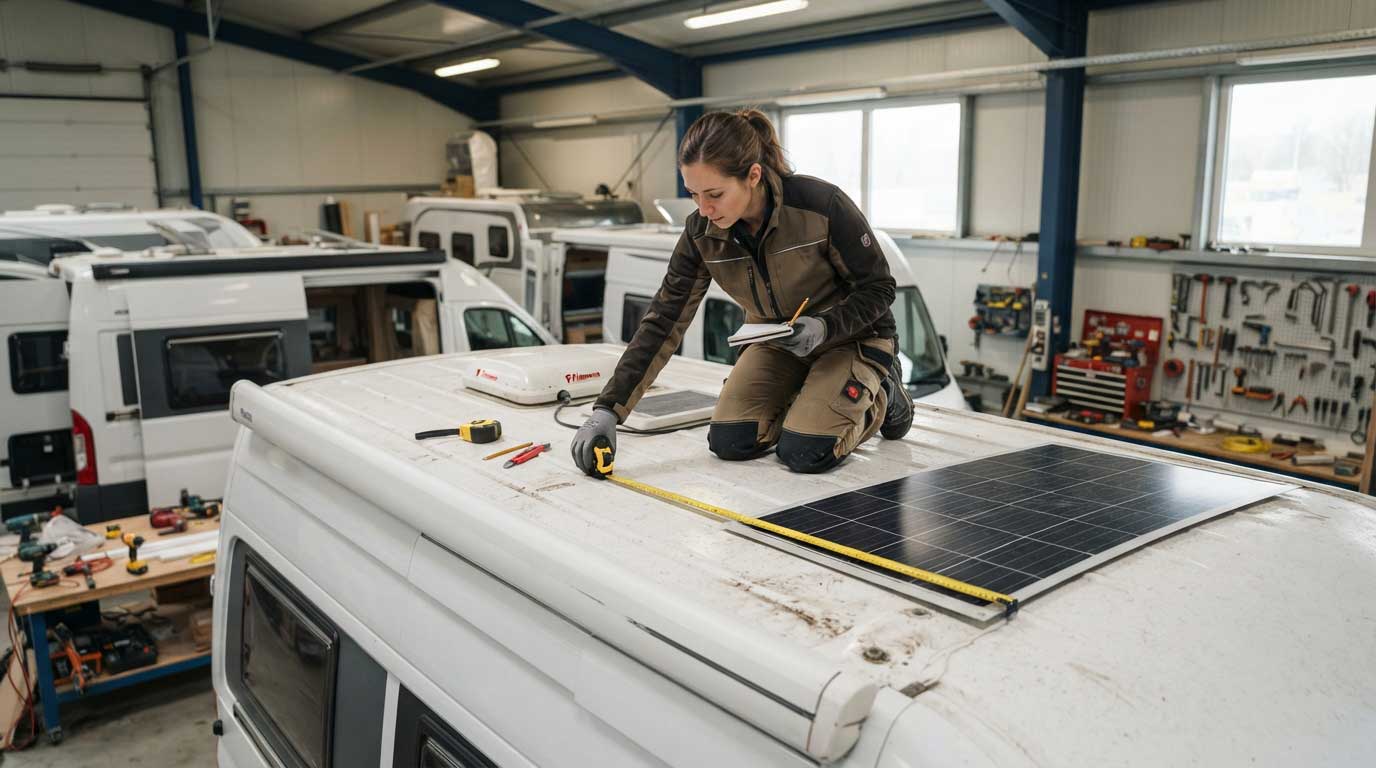
An RV owner wants to add solar charging but does not want conventional mounting brackets to interfere with roof access. The owner is considering flexible adhesive solar panels. Before choosing a module, the installer maps the roof fittings and measures the available area, then checks whether the panel’s approved bonding method is compatible with the roof material.
The initial design review identifies three questions:
- Can the roof accept the bonding system? The installer checks the coating, surface condition, and manufacturer’s mounting instructions.
- Will the panel operate within its limits? The team reviews the module’s bending restrictions, operating conditions, and electrical ratings.
- Will the expected energy meet the owner’s needs? The installer lists daily loads and compares them with a location-appropriate solar estimate rather than relying on the panel’s wattage label alone.
For illustration, assume the proposed module is rated at 200W and the preliminary calculation uses 4 peak-sun-hours with an assumed 0.8 system factor. The estimated contribution is 640Wh per day. That figure would then be checked against the load profile and revised using better location and system data.
During installation, the technician follows the specified preparation and curing procedure, routes the cables away from abrasion and moving parts, and documents the commissioning readings. If the panel later produces less energy than expected, the owner has a useful record for checking shading, weather, connections, controller settings, and mounting conditions.
The practical lesson is that adhesive installation should be treated as a complete system decision. The bonding method, roof condition, panel specifications, and electrical design all need to agree.
Flexible Adhesive Solar Panels vs. Conventional Mounting
| Consideration | Adhesive mounting | Conventional mechanical mounting |
|---|---|---|
| Roof penetrations | May reduce or avoid drilling, depending on the approved design | May require fasteners or mounting hardware |
| Appearance | Can provide a low-profile look | Hardware may be more visible |
| Surface dependency | Strongly dependent on substrate and adhesive compatibility | Dependent on roof structure and fastener or rack design |
| Removal and repair | Can be more involved, depending on the bonding system | May be simpler where hardware is accessible and removable |
| Installation requirements | Surface preparation, application, and cure conditions are critical | Structural attachment, sealing, and fastener requirements are critical |
| Best selection basis | Approved bonding method and suitable substrate | Approved mounting hardware and adequate structural support |
Neither method is universally preferable. A roof designed for mechanical attachment may not be suitable for adhesive bonding, while a compatible surface may make an approved adhesive system practical. The panel manufacturer’s documentation and the vehicle or vessel requirements should guide the decision.
Common Mistakes to Avoid
- Using an unapproved adhesive: A product that bonds well to one material may not be compatible with another.
- Ignoring the roof coating: A strong adhesive cannot compensate for a weak or peeling surface layer.
- Skipping surface preparation: Dust, grease, moisture, and residue can interfere with bonding.
- Forcing the panel to fit: Bending beyond the stated limit can damage the module.
- Rushing the cure: Follow the bonding system’s specified curing conditions before exposing the installation to service loads.
- Overlooking cable protection: Wiring must be routed to reduce abrasion, pinching, and exposure to avoidable hazards.
- Assuming all flexible panels are waterproof or walkable: Verify each claimed feature against the exact product documentation.
- Estimating energy from wattage alone: Consider solar resource, temperature, shade, orientation, and system losses.
Bright Solar Solutions for B2B Applications
Bright Solar supplies flexible and semi-flexible solar panel solutions for business applications. For OEM, ODM, and bulk procurement, the right product depends on the installation environment, mechanical requirements, electrical design, and the specifications confirmed for the exact module.
When discussing a flexible adhesive solar panel project, B2B buyers should provide:
- Intended application, such as RV, campervan, marine, or off-grid use.
- Mounting surface material and condition.
- Required module dimensions and available installation area.
- Expected electrical-system voltage and controller details.
- Environmental exposure and any applicable compliance requirements.
- Order quantity and customization requirements.
Request the current datasheet and installation instructions before confirming adhesive mounting. Do not assume that every Bright Solar flexible module is adhesive-backed or approved for every substrate. Any bonding method, environmental feature, or product customization should be confirmed for the specific model and configuration.
FAQ About Flexible adhesive solar panels
What are flexible adhesive solar panels?
They are flexible photovoltaic modules intended to be installed using a manufacturer-approved adhesive or bonding system. Their suitability depends on the module design, permitted bending, mounting instructions, and compatibility with the installation surface.
Can flexible adhesive solar panels be installed on any roof?
No. The roof material, coating, condition, curvature, and operating environment all matter. The module and bonding system must be approved for the substrate and installation conditions.
Do adhesive solar panels need drilling?
Some approved adhesive mounting designs may avoid or reduce roof penetrations. Whether drilling is unnecessary depends on the panel instructions, bonding system, and project requirements. Do not alter a specified mounting method without approval.
Can I use ordinary construction adhesive to mount a flexible solar panel?
Do not assume ordinary construction adhesive is suitable. Use the bonding product or method specified by the panel manufacturer, and confirm compatibility with the substrate and environmental conditions.
Are flexible adhesive solar panels suitable for boats?
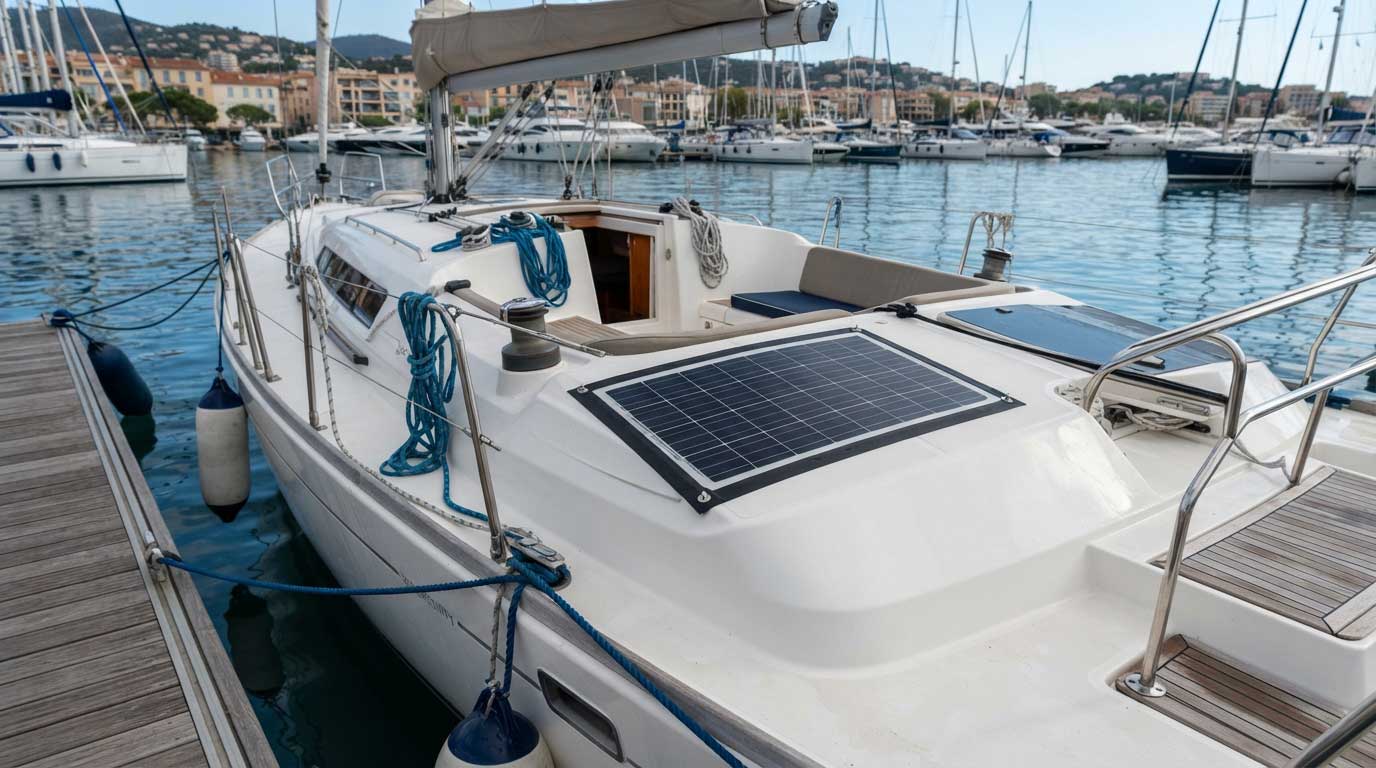
Some modules may be suitable for selected marine applications, but the exact panel’s environmental ratings and mounting instructions must be checked. Flexibility alone does not establish salt-water resistance, waterproofing, or walkability.
How much power can an adhesive flexible solar panel generate?
Energy production depends on rated power, available sunlight, temperature, shading, orientation, and system losses. Use the module’s datasheet and a location-specific estimate rather than treating nominal wattage as guaranteed daily energy.
What should I ask a supplier before ordering?
Request the exact model’s datasheet, mounting instructions, approved adhesive or bonding details, dimensions, weight, electrical parameters, bending limits, environmental ratings, warranty terms, and customization information. Confirm that the documentation applies to the quoted configuration.
Conclusion
Flexible adhesive solar panels can be useful for selected RV, campervan, marine, and off-grid installations where a low-profile mounting approach is appropriate. But flexibility and adhesive mounting are not universal permissions: the panel, bonding system, substrate, and environment must be compatible.
For Bright Solar projects, confirm the exact module specifications and mounting instructions before procurement or installation. Careful surface inspection, approved bonding procedures, sound electrical design, and realistic output estimates help create a system that is practical to install and easier to maintain.
Related recommendations
-

Parallel vs Series Solar Panels: Complete Guide to Solar Panel Connections
217Learn parallel vs series solar panels wiring, voltage differences, and the best setup for RV, off-grid, and solar systems. Discover expert tips from Bright Solar.
View details -
100W Flexible Solar Panel: Lightweight Solar Power That Makes Sense Off-Grid
116Discover how a 100W flexible solar panel delivers lightweight, reliable solar charging for RVs, boats, campers, and portable off-grid systems.
View details -
Jinko Solar Signed a Supply Agreement with Datang Group for About 1 GW of n-type Tiger Neo Components
225Jinko Solar signed a supply agreement with Datang Group for about 1 GW of n-type tiger Neo components, supplying 560W Tiger Neo n-type TOPCon modules to Datang Group’s large ground-mounted projects in China, including agricultural-PV and rocky des...
View details -
200w solar panel flexible (Real Field Performance Guide from Bright Solar)
159200w solar panel flexible explained with real RV field data, installation insights, off-grid performance results, and practical energy system design guidance.
View details