Installing Solar Panels on RV: Complete Step-by-Step Guide for Reliable Off-Grid Power
Installing solar panels on RV requires careful planning, correct roof mounting, proper wiring, and a matched battery system. The process starts with calculating energy needs, choosing suitable panels, installing a charge controller, and testing the complete system before traveling.
After working with RV solar projects and flexible solar panel applications at Bright Solar, I have found that the biggest installation problems rarely come from the solar panels themselves. Most failures happen because of poor roof sealing, undersized cables, incorrect controller selection, or rushed wiring decisions.
A good RV solar installation is not just about attaching panels to a roof. It is about building a small energy system that survives vibration, temperature changes, rain, dust, and thousands of miles of road travel.
According to RV solar installation references, a complete system normally includes solar panels, a charge controller, battery storage, protection devices, wiring, and an inverter when AC power is required.
Why Installing Solar Panels on RV Is Becoming More Popular
The RV lifestyle has changed significantly. More travelers are choosing boondocking, remote camping, and off-grid adventures instead of staying only at campgrounds with electrical hookups.
A properly designed RV solar system allows travelers to:
- Recharge house batteries during daylight
- Reduce generator usage
- Run small appliances
- Extend camping time in remote areas
- Create emergency backup power
During one RV solar consultation project, a customer with a 24-foot travel trailer originally relied on a portable generator every evening. After installing a 400W solar array with lithium battery storage, generator usage dropped from almost daily operation to only occasional backup use during several weeks of cloudy weather.
The biggest improvement was not only fuel savings. The owner mentioned that the quiet camping experience was the reason he enjoyed the upgrade most.
That detail is often ignored.
Solar power changes the way people use an RV.
Understanding the Main Components Before Installing Solar Panels on RV
Before drilling holes or mounting anything, understand what each component does.
A typical RV solar system includes:
| Component | Function |
|---|---|
| Solar Panels | Convert sunlight into DC electricity |
| Solar Charge Controller | Controls charging voltage and protects batteries |
| Battery Bank | Stores solar energy |
| Inverter | Converts DC power into household AC power |
| Solar Cables | Transfer electrical energy |
| Fuse / Breaker | Protects wiring and equipment |
| Mounting Hardware | Secures panels to RV roof |
Many beginners focus only on panel wattage.
That is where mistakes start.
A 400W solar panel system with poor wiring can perform worse than a 200W system designed correctly.
How to Calculate Solar Power Requirements Before RV Installation
Calculate Daily Energy Consumption
The first step is understanding how much electricity your RV actually uses.
Use this formula:
Daily Energy Consumption (Wh) = Device Wattage × Running Hours
Example:
| Appliance | Power | Usage Time | Daily Energy |
|---|---|---|---|
| LED Lights | 20W | 5 hours | 100Wh |
| Phone Charging | 10W | 3 hours | 30Wh |
| Laptop | 60W | 3 hours | 180Wh |
| RV Fan | 40W | 6 hours | 240Wh |
| Refrigerator Electronics | 50W | 10 hours | 500Wh |
Total:
Approximately 1,050Wh/day
A solar system needs enough output to replace this energy while also compensating for weather losses.
The U.S. Department of Energy explains that solar production depends on factors including sunlight availability, system orientation, location, and equipment efficiency.
Source: https://www.energy.gov/
Choosing the Right Solar Panel Size for RV Installation
The correct panel size depends on:
- RV roof space
- Battery capacity
- Daily electricity usage
- Travel style
- Climate conditions
Common RV solar configurations:
| RV Usage | Recommended Solar Size |
|---|---|
| Basic weekend camping | 100W–200W |
| Small camper with lights and devices | 200W–400W |
| Full-time RV living | 400W–800W |
| Heavy off-grid usage | 800W+ |
For many RV owners, 400W has become a practical balance between available roof space and energy production.
Winnebago notes that many RV solar setups commonly use 200W–400W systems depending on power requirements and equipment usage.
Selecting Flexible or Rigid Solar Panels for RV Roof Installation
One of the first decisions is choosing between rigid solar panels and flexible solar panels.
Rigid Solar Panels
Advantages:
- Higher durability
- Better airflow underneath
- Long service life
- Easier heat management
Disadvantages:
- Heavier
- Require brackets
- Need more roof clearance
Rigid panels are common on large motorhomes where roof space is available.
Flexible Solar Panels
Flexible panels are becoming popular for RV applications because they are:
- Lightweight
- Low profile
- Easier to install on curved surfaces
- Less visually noticeable
Bright Solar flexible solar panels are designed for applications where weight and installation flexibility matter, including RV roofs, marine systems, and portable power solutions.
A real installation example:
A customer using a compact camper van had only 2.1 square meters of usable roof space because of roof vents and a storage rack. Traditional framed panels could not fit efficiently. A flexible solar panel layout allowed the available area to be used without increasing roof height.
The result:
- Lower wind resistance
- Cleaner appearance
- More usable solar area
Preparing Tools and Materials Before Installation
A common mistake is starting installation before collecting every component.
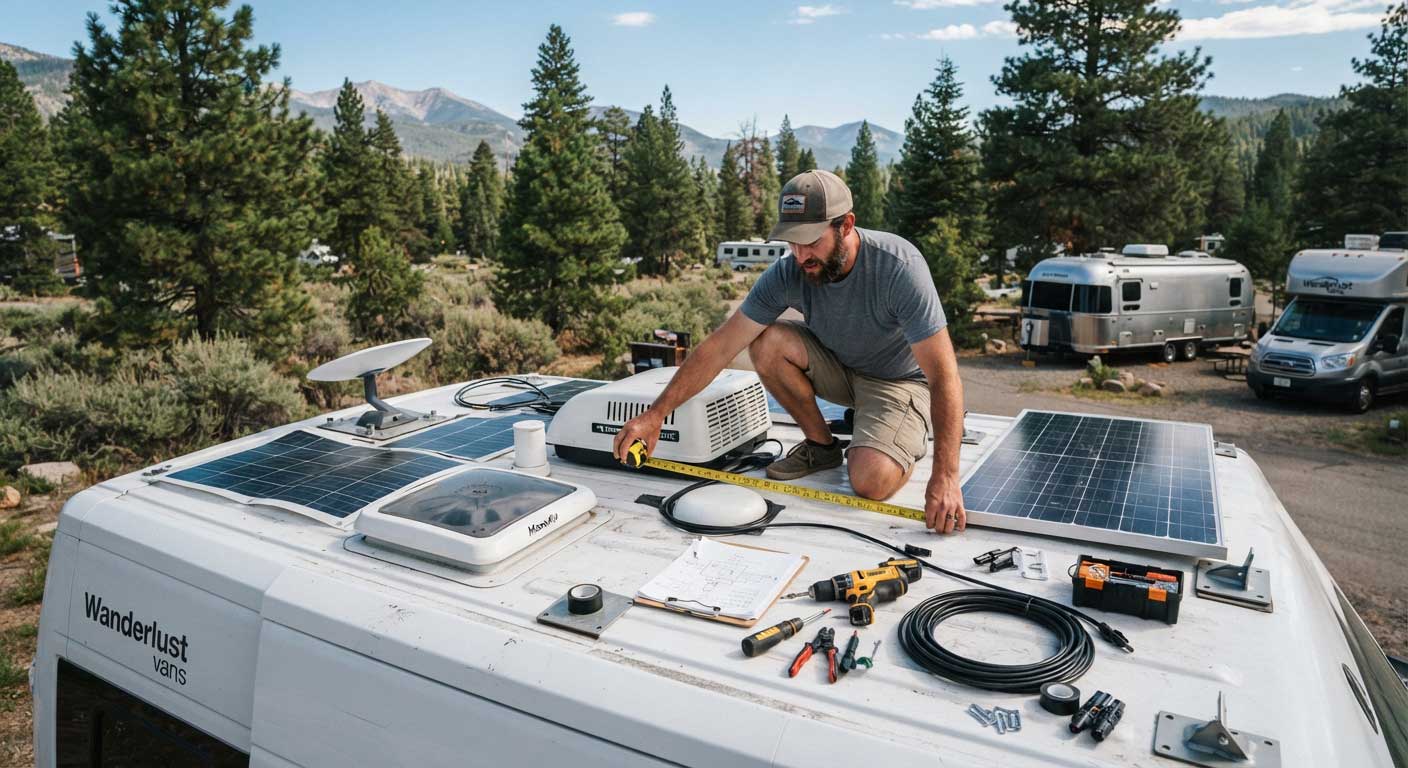
A professional RV solar installation usually requires:
Tools
- Electric drill
- Multimeter
- Wire stripper
- Crimping tool
- Screwdriver set
- Measuring tape
- Sealant applicator
Materials
- Solar panels
- MPPT charge controller
- Solar cables
- MC4 connectors
- Roof entry gland
- Fuse holders
- Battery cables
- Waterproof sealant
- Mounting brackets or adhesive system
Industry installation guides recommend preparing the complete wiring and protection components before mounting panels because changing cable routes after installation can create unnecessary roof modifications.
Step-by-Step Process for Installing Solar Panels on RV
Step 1 — Inspect the RV Roof
Before installation:
Check:
- Roof material
- Existing damage
- Water leaks
- Available mounting area
- Shade sources
Avoid placing panels directly behind:
- Air conditioners
- Roof vents
- Satellite antennas
- Roof racks
Even partial shading can reduce solar production.
Step 2 — Create the Panel Layout
Do not immediately drill holes.
Place the panels first.
I usually recommend a “dry layout test”:
- Put panels on the roof
- Check sunlight exposure
- Confirm cable routing
- Measure distance to controller location
- Mark final positions
This simple step prevents many expensive mistakes.
A roof hole cannot be moved easily.
Step-by-Step Process for Installing Solar Panels on RV (Continued)
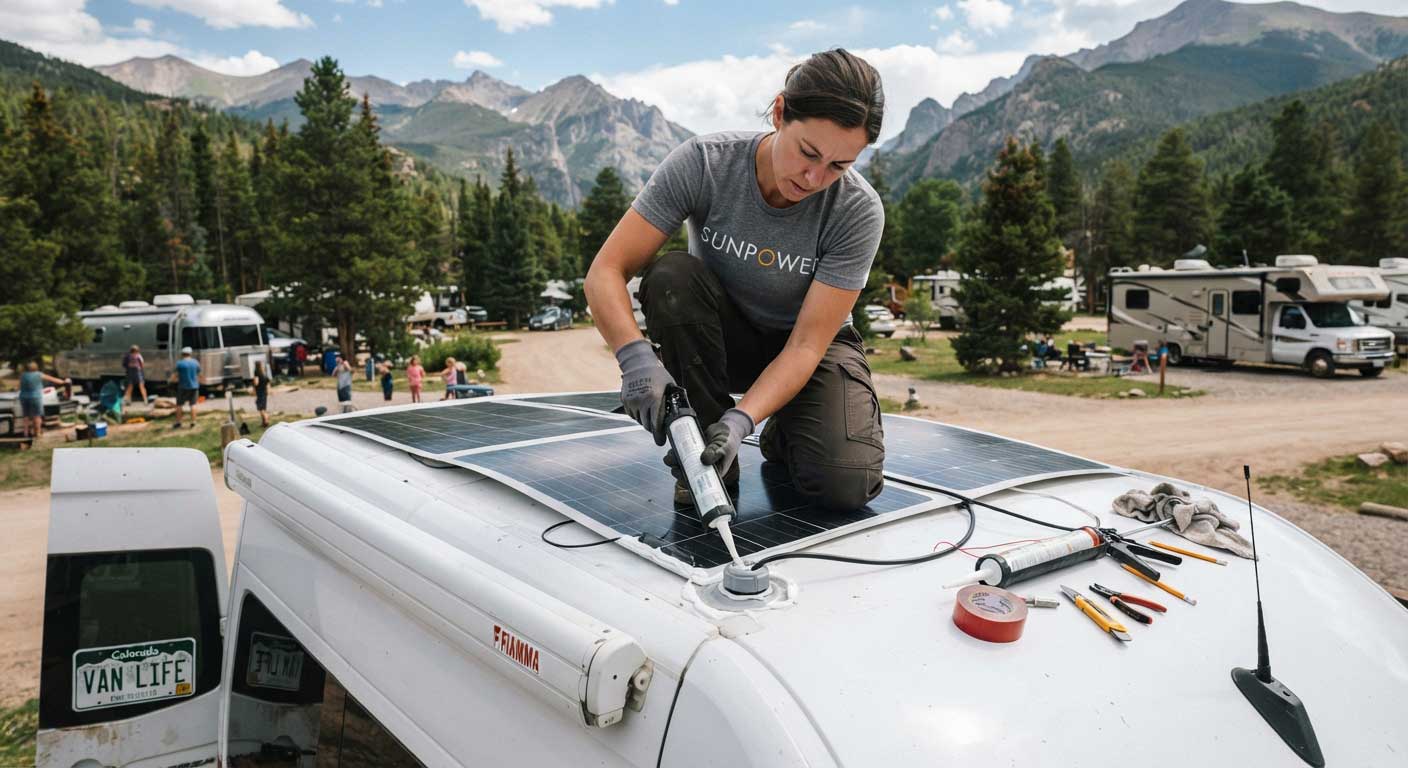
Step 3 — Mount Solar Panels Securely on the RV Roof
After confirming the layout, the next step is fixing the panels permanently.
The mounting method depends on the solar panel type and RV roof material.
Common installation methods include:
| Mounting Method | Best For | Advantages | Considerations |
|---|---|---|---|
| Aluminum brackets | Rigid solar panels | Strong and durable | Requires drilling |
| VHB adhesive tape | Lightweight panels | No major drilling | Needs clean surface preparation |
| Industrial adhesive | Flexible solar panels | Low profile installation | Requires proper curing time |
| Corner mounts | Flat RV roofs | Easy adjustment | Adds roof height |
For flexible solar panels, surface preparation is more important than the adhesive itself.
Before installation:
- Clean the roof with a non-abrasive cleaner
- Remove dust, oil, and wax residue
- Allow the surface to dry completely
- Mark the final position
- Apply adhesive evenly
- Press the panel firmly
During Bright Solar flexible panel testing and installation evaluations, one repeated issue appeared: installers often underestimated roof contamination. A thin layer of dust or silicone residue can significantly reduce adhesive bonding strength.
The panel may look secure on day one, but vibration from highway driving exposes weak installation points.
Connecting Solar Panels, Charge Controller, and RV Battery
After mechanical installation, electrical connection becomes the most important stage.
A solar system normally follows this connection order:
Solar Panel → Charge Controller → Battery → Inverter (optional)
Many beginners connect panels directly to batteries.
That is incorrect.
The charge controller regulates voltage and protects the battery from overcharging.
Choosing MPPT or PWM Charge Controller
For RV solar systems, MPPT controllers are usually preferred because they maximize energy harvesting, especially when panel voltage changes during different weather conditions.
Comparison:
| Feature | PWM Controller | MPPT Controller |
|---|---|---|
| Cost | Lower | Higher |
| Efficiency | Moderate | Higher |
| Best Use | Small systems | Larger RV systems |
| Energy Harvesting | Limited | Optimized |
According to the National Renewable Energy Laboratory (NREL), photovoltaic system performance depends heavily on system design, operating conditions, and conversion efficiency.
Reference:
https://www.nrel.gov/solar/
For a modern RV setup using lithium batteries and 300W–800W solar capacity, MPPT controllers are commonly selected because they provide better energy utilization.
Wiring Solar Panels Correctly for RV Applications
Solar panels can be wired in:
- Series
- Parallel
- Series-parallel
Each method changes system voltage and current.
Series Connection
Advantages:
- Higher voltage
- Lower current
- Smaller cable losses
- Better for longer cable distances
Example:
Two 200W panels:
Panel voltage: 20V
Series connection:
20V + 20V = 40V
Current remains the same.
Parallel Connection
Advantages:
- Maintains lower voltage
- Better for systems requiring battery-compatible voltage
- One shaded panel affects less of the system
Example:
Two 200W panels:
Voltage remains around 20V
Current doubles.
For RV installations, the best wiring method depends on:
- Controller voltage range
- Battery voltage
- Cable distance
- Shade conditions
There is no universal “best” connection.
The correct design is the one matching the entire system.
Installing Solar Battery Storage for RV Off-Grid Use
Solar panels only produce power during daylight.
The battery stores energy for:
- Night lighting
- Refrigerator operation
- Electronics
- Water pumps
- Fans
Popular RV battery options:
| Battery Type | Advantages | Typical RV Use |
|---|---|---|
| AGM | Reliable, affordable | Small RV systems |
| Gel | Stable performance | Moderate usage |
| Lithium LiFePO4 | Lightweight, long lifespan | Modern off-grid RV systems |
A lithium battery usually provides more usable capacity compared with traditional lead-acid batteries because it can safely use a larger percentage of stored energy.
Example:
A 100Ah lithium battery:
Approximate usable energy:
12.8V × 100Ah = 1,280Wh
A camper using 500–800Wh daily could operate several hours depending on weather and additional loads.
Real RV Solar Installation Case Study
400W Solar System Installation on a Travel Trailer
One Bright Solar application review involved a couple traveling across western states with a 25-foot travel trailer.
Their original setup:
- 12V AGM battery
- Small portable solar panel
- Frequent campground electricity use
Main problems:
- Refrigerator consumed battery power quickly
- Generator noise disturbed camping experience
- Limited remote camping ability
Updated system:
- 400W solar panels
- MPPT controller
- 200Ah LiFePO4 battery
- 2000W inverter
Results after testing:
| Category | Before Upgrade | After Upgrade |
|---|---|---|
| Generator usage | 5–6 days/week | Less than 1 day/week |
| Battery capacity | 100Ah AGM | 200Ah Lithium |
| Off-grid stay | 1–2 nights | 5+ nights depending on weather |
The owner’s biggest feedback was unexpected:
“The solar system gave us confidence to stop planning trips around electrical hookups.”
That is the real value of RV solar.
Not just electricity.
Freedom.
Common Mistakes When Installing Solar Panels on RV
Using Too Small Solar Cables
Small cables create voltage loss.
Long cable distances require proper wire sizing.
A 400W system can lose noticeable power when using undersized wiring.
Poor Roof Waterproofing
A solar installation creates new roof penetration points.
Every cable entry should include:
- Waterproof gland
- UV-resistant sealant
- Proper curing time
Water damage usually costs far more than solar equipment replacement.
Ignoring Future Power Needs
Many RV owners install only enough solar for today.
But energy usage grows.
Later additions may include:
- Starlink internet
- Additional refrigeration
- Larger inverter
- Electric cooking equipment
Planning extra capacity often reduces future upgrade costs.
FAQ About Installing Solar Panels on RV Guide
Can I install solar panels on my RV myself?
Yes. Many RV owners complete DIY installations if they understand electrical safety, roof sealing, and wiring requirements. However, larger systems should be carefully designed before installation.
How many solar panels do I need for an RV?
Most RV users need between 200W and 600W depending on appliances, battery capacity, and travel habits. Full-time off-grid users often install 600W or more.
Are flexible solar panels good for RV roofs?
Yes. Flexible solar panels are useful for RV roofs because they are lightweight, low-profile, and easier to install on curved surfaces.
Do RV solar panels work on cloudy days?
Yes, but output decreases. Solar production depends on sunlight intensity, weather, panel angle, and system efficiency.
Should RV solar panels be connected in series or parallel?
The best option depends on your charge controller, battery voltage, cable length, and shading conditions. Many larger RV systems use series or series-parallel configurations.
How long do RV solar panels last?
Quality solar panels can operate for decades. Many manufacturers provide performance warranties around 20–25 years depending on panel technology.
Authority & Reference Sources
U.S. Department of Energy – Solar Photovoltaic Basics
The Department of Energy explains that solar photovoltaic output depends on sunlight availability, system orientation, location, and equipment performance.
National Renewable Energy Laboratory (NREL) – Solar Research Data
NREL provides photovoltaic performance research, reliability studies, and solar technology analysis used throughout the renewable energy industry.
Winnebago – RV Solar System Information
Winnebago provides RV lifestyle resources and practical information about solar power applications in recreational vehicles.
Conclusion: Installing Solar Panels on RV Creates True Energy Independence
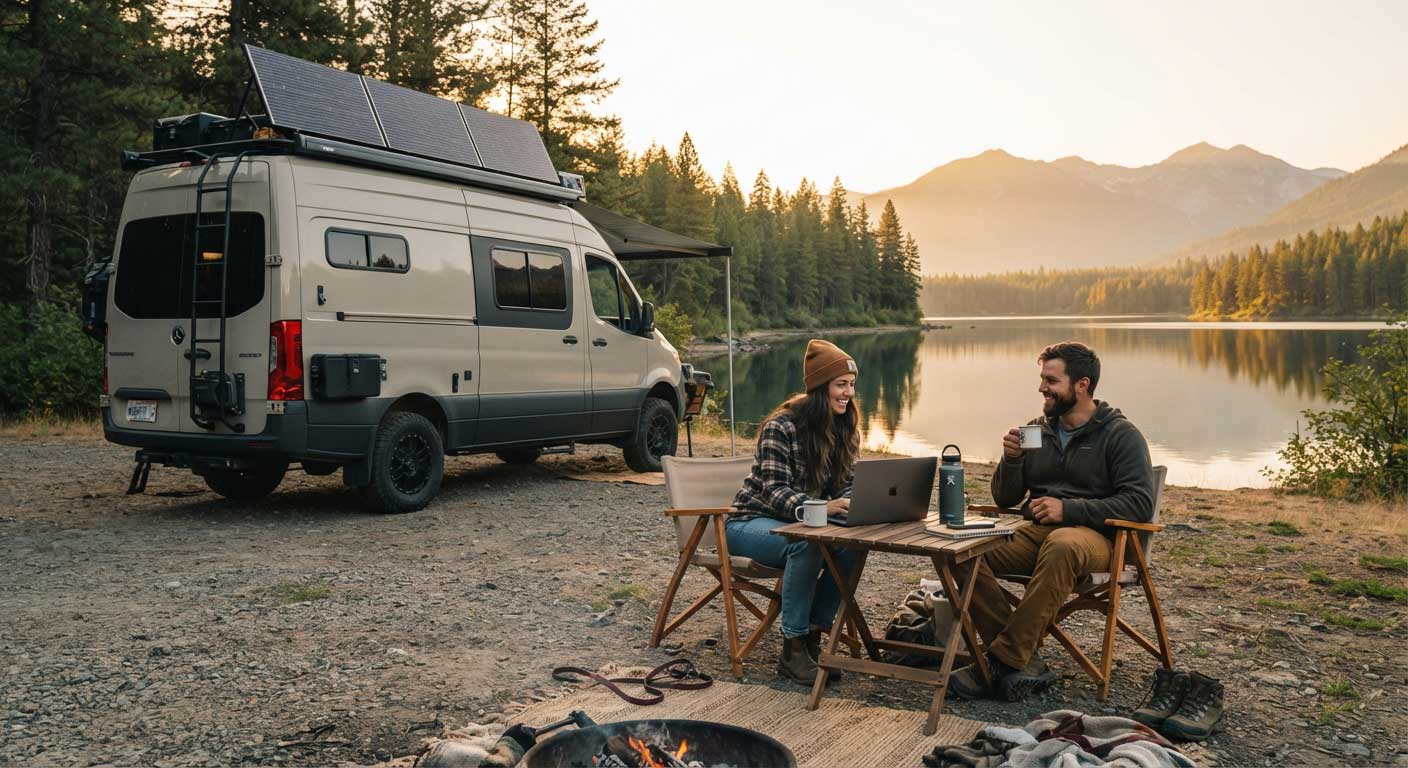
Installing solar panels on RV is more than a technical upgrade. It changes how travelers use their vehicles.
A successful installation combines:
- Correct solar sizing
- Reliable mounting
- Proper waterproofing
- Safe wiring
- Suitable battery storage
From small camper vans to full-time motorhomes, a well-designed solar system can reduce dependence on campground electricity and generators.
At Bright Solar, we focus on flexible solar solutions designed for real-world applications including RVs, marine systems, and off-grid environments.
The best RV solar installation is not the largest system.
It is the system designed around your actual journey.
Related recommendations
-

400W Flexible Solar Panel: High-Output Solar Power Without the Weight
152400w flexible solar panel solutions for RVs, boats, and off-grid systems. Discover lightweight ETFE solar panels with high efficiency and real-world durability.
View details -
Wiring Solar Panels in Series: When It Works Best and When It Doesn’t
128Learn wiring solar panels in series correctly for RVs, boats, mobile homes, and off-grid systems. Discover voltage benefits, sizing tips, real-world examples, and installation best practices.
View details -
Tiny Home Solar Panels: Complete Guide to Solar Power Systems
127Tiny home solar panels provide clean, reliable power. Learn sizing, costs, installation tips, batteries, and flexible solar solutions from Bright Solar today.
View details -
Portable Solar Generator for RV: Complete Buying and Setup Guide
214A portable solar generator for RV stores solar energy in a battery and provides power through an inverter for compatible RV appliances and electronics.
View details