how to make a portable solar panel stand?
Direct Answer :
To make a portable solar panel stand, build a lightweight hinged frame from aluminum or weather-resistant wood, add adjustable support legs for tilt control, and provide a wide, stable base. Size the frame to the panel, protect its edges, and make the stand easy to fold, carry, and store.
Start With the Solar Panel, Not the Stand
A portable stand should be designed around the actual panel dimensions and weight. This sounds obvious, but it prevents one of the most common DIY problems: building a sturdy-looking frame that puts pressure on the panel or leaves its corners unsupported.
For a Bright Solar portable panel, first record:
- Panel length and width
- Panel weight
- Frame or edge construction
- Available mounting points
- Cable exit location
- Connector position
- Maximum recommended bending radius, if applicable
- Whether the panel is rigid, semi-flexible, or flexible
The stand does not need to carry unnecessary material. It needs to keep the panel at a useful angle without twisting it.
For flexible or semi-flexible solar panels, I would avoid simply clamping the panel between two narrow wooden rails. Uneven pressure can create local stress. A better approach is a broad support surface with carefully positioned attachment points.
Choose a Simple Portable Stand Design
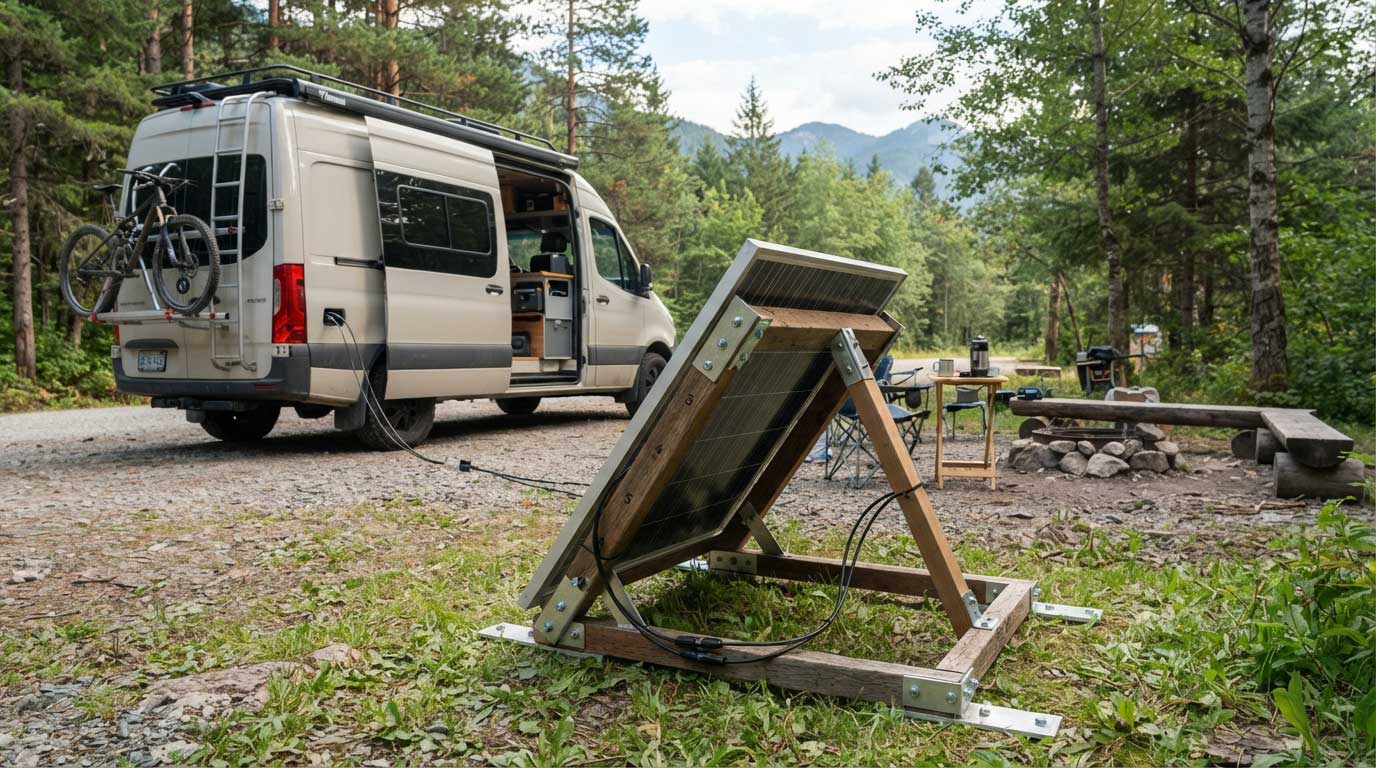
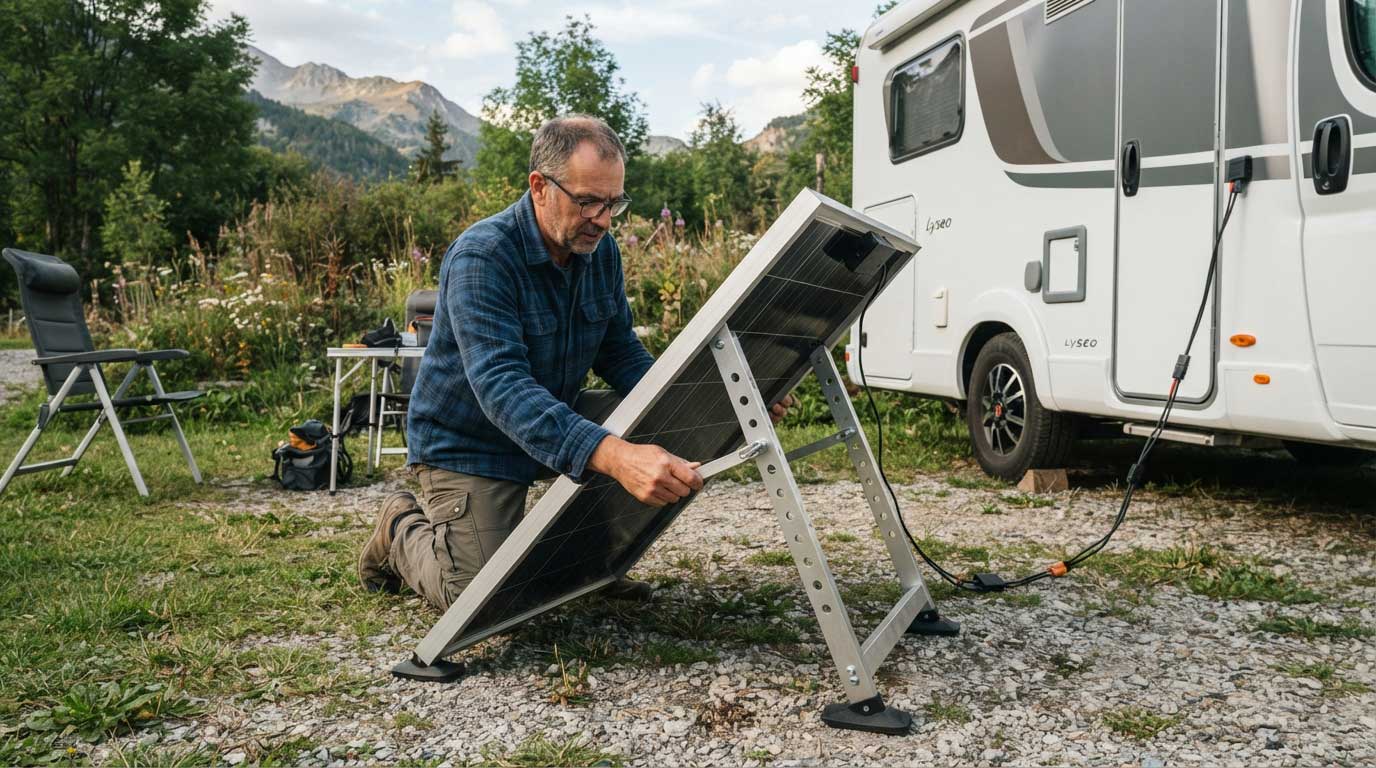
For an RV, camping, boat, or temporary off-grid setup, a folding A-frame is usually easier to build than a complicated tracking structure.
The basic arrangement is:
Solar panel → hinged support frame → adjustable rear leg → stable ground
A practical DIY stand can use:
| Component | Suggested material | Purpose |
|---|---|---|
| Main frame | Aluminum angle or treated wood | Supports panel |
| Rear legs | Aluminum tube or wood | Creates tilt |
| Hinge | Stainless steel hardware | Allows folding |
| Adjustment holes | Metal plate or drilled rail | Changes tilt |
| Foot pads | Rubber or wide blocks | Improves stability |
| Fasteners | Stainless steel | Outdoor durability |
| Cable clips | UV-resistant clips | Keeps wiring controlled |
Aluminum is attractive when portability matters. Wood is easier to cut with basic tools and can be perfectly serviceable for occasional camping, provided it is protected against moisture.
The frame should remain relatively light. Adding kilograms of material simply to make a small portable panel “feel solid” defeats part of the reason for using portable solar equipment.
Give the Stand an Adjustable Tilt
A fixed-angle stand is simple, but an adjustable stand is considerably more useful outdoors.
The sun does not remain in the same position throughout the day. NREL’s PVWatts modeling tools explicitly use tilt, azimuth, time, location, irradiance, temperature, and other parameters when estimating PV performance.
NREL documentation also notes that a fixed PV array is commonly modeled with a tilt related to site latitude, while seasonal adjustments can change the balance between summer and winter production.
For a homemade portable stand, you do not need a complicated tracking mechanism.
A simple rear-leg system works:
- Short rear position = lower panel angle
- Middle position = moderate angle
- Long rear position = steeper angle
- Lock each position securely before leaving the panel unattended
Drill several holes along the rear support or use a locking pin. The adjustment should be possible without lifting the entire panel.
Why Panel Direction Matters
Tilt is only part of the positioning equation.
Azimuth describes the horizontal direction the panel faces. NREL defines north as 0°, east as 90°, south as 180°, and west as 270° in its solar-position documentation.
For northern-hemisphere installations, NREL’s solar siting guidance says PV systems are ideally oriented within 45° of true south to maximize electricity production, although actual site conditions and system design can change the result.
That is useful for a portable stand because you can physically turn the entire assembly during the day instead of building a tracking mechanism.
Build for Wind, Uneven Ground, and Real Camping
A stand that works perfectly on a workshop floor may behave differently on grass, gravel, sand, or a campsite with a slight slope.
This is where many DIY designs need more attention.
The feet should be wide enough to resist tipping, and the rear support should lock positively rather than relying on friction alone. If the panel is large, the wind load can become more important than the panel’s weight.
NREL’s technical guidance recognizes wind and other environmental variables as part of PV performance modeling.
For a portable stand, that translates into a practical rule: do not optimize only for minimum weight.
A few useful details:
- Use broad rubber feet on hard surfaces.
- Use longer stakes only where campsite rules permit them.
- Add a low crossbar between legs if the frame twists.
- Keep the center of gravity inside the footprint.
- Do not leave a lightweight panel exposed during strong winds.
- Never use loose stones or improvised objects that could scratch or damage the panel.
If the stand starts moving when you push the upper edge lightly by hand, it needs more stability before the panel is left outside.
Make the Stand Fold Without Removing the Panel
Portability is more than low weight.
A stand that requires twelve screws and a toolbox every time the RV moves is technically portable but inconvenient in practice.
A better design folds around the panel or folds into a compact separate package.
For a folding A-frame:
- Attach the panel support frame to the front section.
- Hinge the rear support to the frame.
- Add several adjustment positions.
- Use locking pins instead of loose bolts where repeated adjustment is expected.
- Make sure cables have enough slack for folding.
- Check that no cable is trapped between moving sections.
The last point is easy to miss.
When the panel is folded after a long day outdoors, the cable often gets wrapped around a hinge or trapped underneath a frame member. After repeated use, that can damage insulation or connectors.
I prefer routing the cable along the stationary section and leaving one controlled service loop near the moving joint.
Selecting the Right Material for a Portable Solar Stand
| Material | Weight | DIY difficulty | Outdoor durability | Best use |
|---|---|---|---|---|
| Aluminum angle | Low | Medium | High | Frequent RV travel |
| Aluminum tube | Low | Medium | High | Folding frames |
| Treated wood | Medium | Low | Medium | Simple camping builds |
| Stainless steel | High | High | Very high | Hinges and hardware |
| PVC | Low | Low | Low–medium | Temporary prototypes |
For a frequently transported stand, aluminum is usually easier to justify because the frame can remain relatively light while retaining useful rigidity.
For a weekend project, however, a well-built wooden prototype can be a sensible way to test dimensions and tilt positions before committing to metal fabrication.
There is no reason to make the first version perfect.
Build it. Put the panel on it. Carry it 30 metres from the RV. Fold it. Set it up again. That sequence reveals problems that measurements alone often miss.
Avoid Blocking the Panel’s Surface
The support structure should hold the panel without unnecessarily shading active cells.
That becomes particularly important with narrow support rails, crossbars, clamps, and decorative frame pieces.
A stand can be structurally strong and still be poorly designed if a bar casts a shadow across the panel during useful sunlight hours.
NREL’s PVWatts system accounts for shading and wiring among system-loss inputs, reinforcing that real-world PV output is affected by more than the nameplate rating.
Keep the structure outside the active solar surface whenever the panel design allows it.
How Much Tilt Should a Portable Solar Stand Have?
There is no single angle that works best for every location and every season.
For a fixed installation, NREL documentation commonly uses site latitude as a starting point for fixed-array tilt modeling, while seasonal optimization can move the angle lower for summer or higher for winter.
A portable stand gives you something a roof-mounted array does not: you can change the angle without rebuilding the installation.
For practical DIY construction, multiple adjustment positions are more useful than trying to create a mechanically perfect continuous-angle system.
A stand with three or four secure positions is often easier to build, transport, and operate.
The panel should also remain stable at every position. An angle that produces excellent theoretical irradiance but makes the panel unstable in wind is not a useful field setting.
Quick DIY Portable Solar Stand Checklist
Before using the stand outdoors, check:
- Panel dimensions measured accurately
- Panel weight accounted for
- Frame supports the panel without excessive point pressure
- Tilt adjustment locks securely
- Feet remain stable on uneven ground
- Hinges cannot pinch solar cables
- No frame member unnecessarily shades the panel
- Electrical connectors remain off wet ground
- Stand can be folded without damaging the panel
- The complete assembly can be carried comfortably
A useful field test is simple: assemble the stand at home, connect the panel, move it to several surfaces, and deliberately adjust it several times. If the setup feels awkward before the first trip, it will feel worse beside an RV after sunset.
FAQ About how to make a portable solar panel stand?
What is the easiest way to make a portable solar panel stand?
A folding A-frame with an adjustable rear support is one of the simplest designs. It can be made from aluminum angle, aluminum tube, or weather-resistant wood and adjusted to several useful tilt positions.
Can I make a portable solar panel stand from wood?
Yes. Treated or properly protected wood can work well for a DIY stand, particularly for occasional camping. Keep the frame dry when stored and use corrosion-resistant hardware for outdoor exposure.
What angle should a portable solar panel stand use?
The appropriate angle depends on location, season, panel orientation, and the purpose of the installation. NREL’s PVWatts modeling uses tilt and azimuth as important inputs when estimating PV production.
Should a portable solar panel stand be adjustable?
An adjustable stand is useful because the sun’s position changes throughout the day and across seasons. Multiple secure tilt positions are usually more practical than a complicated tracking mechanism.
How do I stop a portable solar panel stand from tipping over?
Use a wide footprint, secure locking points, stable feet, and appropriate anchoring where permitted. On windy days, reduce exposure or store the panel rather than relying on a lightweight DIY structure.
Can I use a homemade stand with a flexible solar panel?
Yes, but the support design should follow the panel manufacturer’s requirements. Flexible panels should not be sharply bent, twisted, or clamped in ways that create concentrated mechanical stress.
Does changing the panel angle really affect solar output?
Yes. Panel tilt and orientation affect the sunlight reaching the module. NREL’s PV modeling tools explicitly account for tilt, azimuth, solar position, irradiance, temperature, and other variables when estimating PV performance.
Conclusion
Learning how to make a portable solar panel stand is less about building a complicated structure and more about getting a few physical details right: adequate support, useful tilt adjustment, stable feet, protected cables, and easy folding.
For Bright Solar portable solar panels, the stand should complement the panel rather than force it into an unsuitable mounting position. Build around the actual panel dimensions, test the frame outdoors, and make the finished setup light enough that you will actually want to carry it.
Related recommendations
-

What can i run on a 100 watt solar panel?
190What can i run on a 100 watt solar panel? Explore real power examples, device compatibility, energy calculations, and practical off-grid uses with Bright Solar.
View details -
how to install flexible solar panel on rv?
139Learn how to install flexible solar panel on rv with real field-tested RV wiring steps, safety notes, and expert insights from Bright Solar installers.
View details -
How to Hook Up Solar Panel to Battery?
153Connect the solar panel to a compatible charge controller first, then connect the controller to the battery with correct polarity.
View details -
Does Cold Weather Affect Solar Panels?
69Does cold weather affect solar panels? Discover how freezing temperatures, snow, and winter sunlight influence solar efficiency and output, plus practical tips for protecting your solar system with Bright solar.
View details