How To Install Solar Panels On A Camper?
How To Install Solar Panels On A Camper?
Installing solar panels on a camper requires selecting the right panel type, mounting location, wiring method, and charge controller. A properly designed camper solar system can provide reliable off-grid electricity for travel, camping, and outdoor living.
For most camper owners, the installation process includes:
- Measuring available roof space
- Choosing suitable solar panels
- Installing mounting hardware
- Connecting charge controllers and batteries
- Testing system performance
At Bright Solar, we have worked with RV and mobile energy applications where installation space is limited and every kilogram matters. One common mistake we see is choosing panels based only on wattage. A camper roof is different from a residential roof — weight, vibration, weather exposure, and available surface area all affect the final design.
A successful camper solar installation is not about adding the largest panel possible. It is about creating a balanced system that fits the vehicle and energy needs.
Understanding Camper Solar Panel Systems
How Does A Camper Solar System Work?
A camper solar system converts sunlight into electricity through photovoltaic panels installed on the vehicle roof or exterior surface.
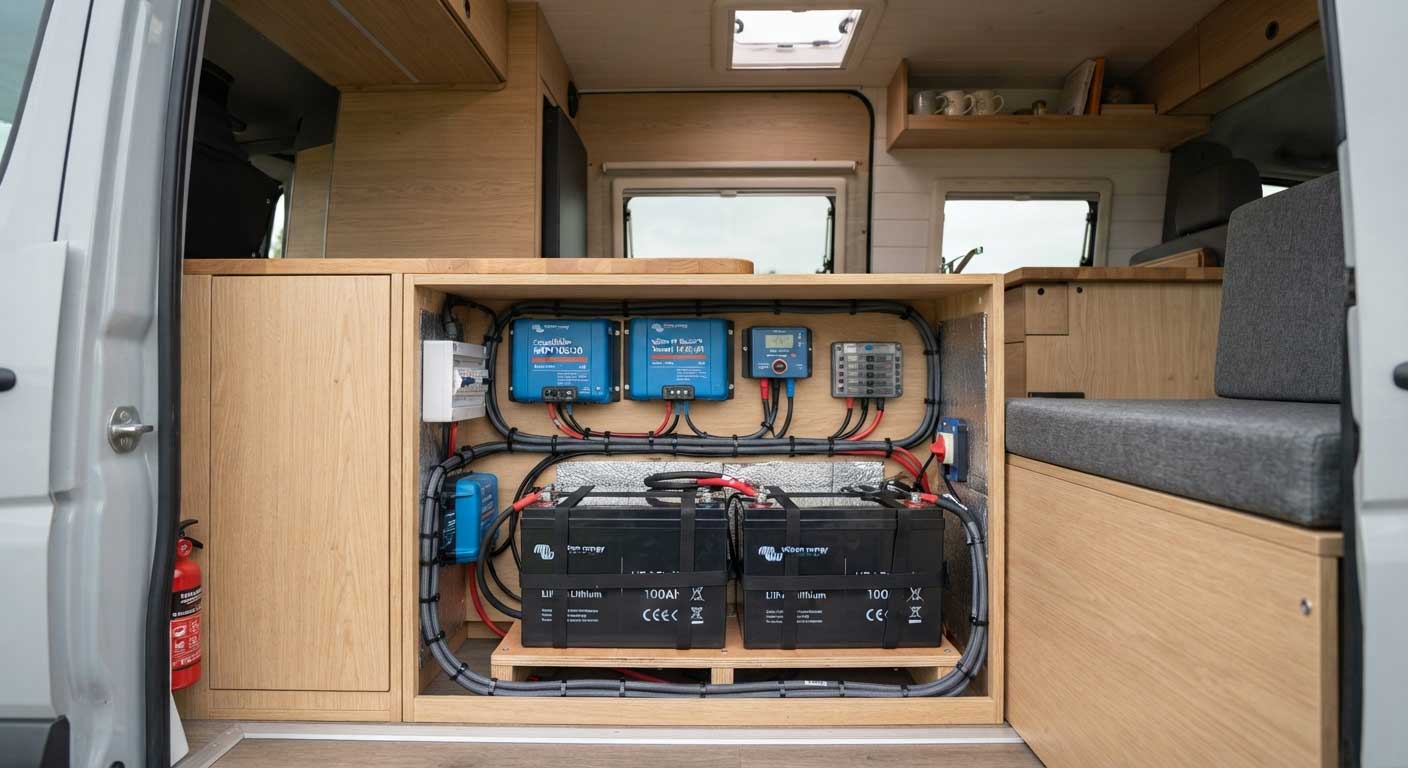
The basic components include:
| Component | Function |
|---|---|
| Solar panels | Capture sunlight and generate DC electricity |
| Charge controller | Regulates power going to batteries |
| Battery bank | Stores electricity for later use |
| Inverter | Converts DC power into AC power |
| Wiring system | Transfers electricity between components |
A typical camper solar setup works like this:
Sunlight → Solar panel → Charge controller → Battery → Camper appliances
The system can power common camper equipment such as:
- LED lighting
- Mobile devices
- Fans
- Refrigerators
- Small electronics
Larger appliances such as air conditioners require a much larger solar and battery system.
According to the U.S. Department of Energy, photovoltaic systems generate electricity by converting sunlight directly into electrical energy through semiconductor materials.
Source:
https://www.energy.gov/eere/solar/solar-photovoltaic-technology-basics
Step 1: Choose The Right Solar Panels For A Camper
Selecting Camper Solar Panel Wattage
Before installation, determine how much electricity your camper needs.
Common camper solar configurations include:
| Solar Capacity | Suitable For |
|---|---|
| 100W–200W | Basic lighting and device charging |
| 300W–500W | Refrigerators, electronics, extended camping |
| 600W–1000W | Larger off-grid camper systems |
A simple calculation:
Daily Energy Usage ÷ Available Sun Hours = Required Solar Capacity
Example:
A camper uses:
- Refrigerator: 600Wh/day
- Lights: 100Wh/day
- Devices: 200Wh/day
Total:
900Wh/day
With approximately 5 sunlight hours:
900Wh ÷ 5 = 180W
After considering system losses, a 200W–300W solar system may be more practical.
Flexible Solar Panels vs Rigid Panels For Campers
Which Solar Panel Type Is Better?
Camper owners usually choose between rigid solar panels and flexible solar panels.
Rigid Solar Panels
Advantages:
- Higher mechanical strength
- Long service life
- Better airflow cooling
Disadvantages:
- Heavier
- Require mounting brackets
- Less suitable for curved roofs
Flexible Solar Panels
Advantages:
- Lightweight design
- Lower installation height
- Suitable for curved surfaces
- Easier transportation
Disadvantages:
- Require careful installation
- Heat management is important
For many camper applications, flexible solar panels are attractive because roof space and weight capacity are limited.
Bright Solar flexible panels are designed for mobile applications where reducing weight while maintaining energy output is important.
Step 2: Prepare The Camper Roof Before Installation
Inspect The Installation Surface
Before attaching solar panels, check:
- Roof material
- Available space
- Existing roof accessories
- Cable entry locations
- Weight limitations
Common camper roof materials include:
- Fiberglass
- Aluminum
- Rubber membrane
- Composite panels
The installation surface must be clean and dry.
Recommended preparation:
- Wash the roof area.
- Remove dust and oil.
- Mark the panel position.
- Confirm cable routing.
- Check clearance around vents and roof equipment.
A small mistake during planning can create bigger problems later. We have seen projects where customers placed panels first and discovered afterward that the cable route was difficult or blocked by roof vents.
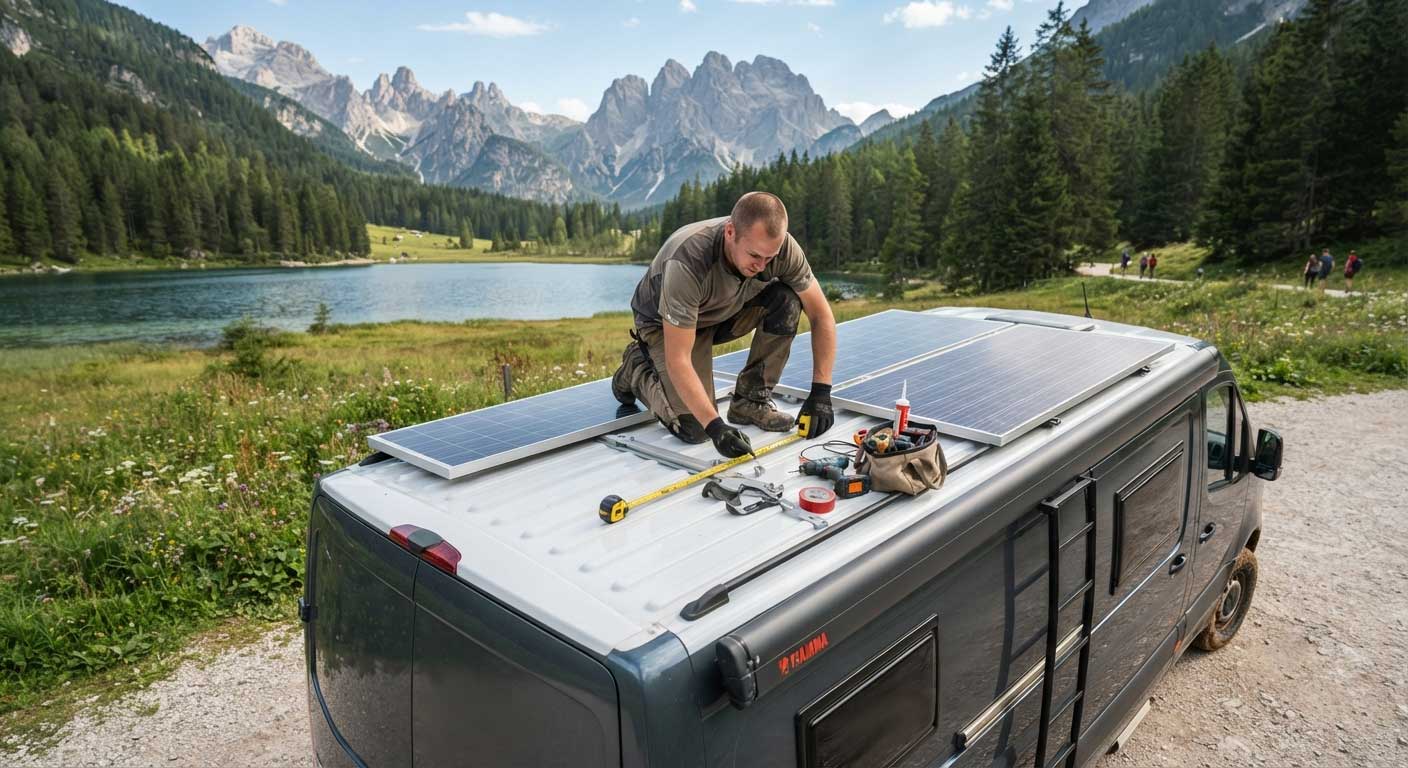
Step 3: Mount Solar Panels On The Camper Roof
Different Camper Solar Mounting Methods
The mounting method depends on the panel type.
Method 1: Adhesive Installation
Common for flexible solar panels.
Process:
- Clean the roof surface.
- Apply suitable marine-grade adhesive.
- Position the solar panel.
- Press evenly.
- Allow curing time.
Benefits:
- Lightweight
- No drilling required
- Low profile
Method 2: Bracket Mounting
Common for rigid solar panels.
Process:
- Install mounting brackets.
- Secure panel frame.
- Seal roof penetration points.
- Connect wiring.
Benefits:
- Strong mechanical support
- Better airflow under panels
- Easier replacement
Step 4: Connect Camper Solar Panel Wiring
How To Wire Solar Panels On A Camper
After mounting the panels, the next step is connecting the electrical system.
A typical camper solar wiring process includes:
- Connect solar panels to the charge controller.
- Connect the charge controller to the battery bank.
- Install an inverter if AC power is required.
- Check voltage and current readings.
- Test the complete system.
The wiring layout depends on whether panels are connected in series or parallel.
| Connection Method | Advantages | Suitable For |
|---|---|---|
| Series connection | Higher voltage, lower current | Longer cable distances |
| Parallel connection | Higher current, similar voltage | Shaded or mobile applications |
For camper systems, many users prefer parallel connections because partial shading can affect series-connected panels more significantly.
However, the best configuration depends on:
- Panel voltage
- Battery voltage
- Charge controller type
- Cable length
Selecting A Charge Controller For Camper Solar
MPPT vs PWM Charge Controllers
The charge controller protects the battery and manages electricity from the solar panels.
Two common types are:
PWM Controller
Advantages:
- Lower cost
- Simple design
- Suitable for small systems
MPPT Controller
Advantages:
- Higher efficiency
- Better energy harvesting
- Works well with higher-voltage panels
For modern camper solar systems, MPPT controllers are often preferred because they can improve energy utilization, especially when sunlight conditions change.
According to the U.S. Department of Energy, improving photovoltaic system efficiency and reducing energy losses are important factors in maximizing solar performance.
Source:
https://www.energy.gov/eere/solar
Waterproofing Camper Solar Cable Entry Points
Preventing Roof Leaks After Installation
One area that requires special attention is the cable entry point.
A solar panel system can generate electricity for years, but poor waterproofing may damage the camper structure.
Recommended practices:
- Use waterproof cable glands
- Apply UV-resistant sealant
- Avoid sharp cable bends
- Secure cables against vibration
Camper vehicles experience constant movement:
- Road vibration
- Temperature changes
- Rain exposure
- Wind pressure
A connection that works perfectly in a garage may fail after thousands of miles on the road if installation quality is poor.
Common Mistakes When Installing Solar Panels On A Camper
Avoid These Installation Problems
Many camper solar problems are caused by installation details rather than the solar panels themselves.
Common mistakes include:
1. Installing Too Much Solar Capacity Without Battery Support
Adding more panels does not automatically create a better system.
The battery capacity and controller must match the solar input.
2. Ignoring Roof Weight Limits
Every camper has structural limitations.
Before installation, consider:
- Panel weight
- Mounting hardware
- Additional equipment
Flexible solar panels can help reduce roof load because they are significantly lighter than many traditional framed modules.
3. Poor Cable Management
Loose cables may cause:
- Damage from vibration
- Water exposure
- Reduced system reliability
A professional installation should keep cables:
- Protected
- Secure
- Easy to inspect
Bright Solar Experience: Designing Solar Systems For Campers
Real Installation Considerations Beyond Specifications
When designing camper solar solutions, we focus on the actual travel environment.
A camper is not a stationary building.
It moves through:
- Desert heat
- Coastal humidity
- Mountain temperatures
- Long-distance road conditions
A solar panel that performs well in a fixed installation may require adjustments for mobile use.
From our experience at Bright Solar, successful camper systems usually balance:
- Weight
- Flexibility
- Power output
- Weather resistance
For example, flexible solar panels can be a practical solution for campers with limited roof space because they adapt better to curved surfaces and reduce unnecessary structural load.
The goal is not simply installing more watts.
The goal is creating dependable energy wherever the road leads.
FAQ About How To Install Solar Panels On A Camper?
Can I install solar panels on my camper myself?
Yes, many camper owners install solar systems themselves. However, electrical connections, waterproofing, and battery wiring require careful planning to ensure safety and reliability.
How many solar panels do I need for a camper?
Most campers use between 200W and 800W of solar capacity. The correct size depends on appliances, battery capacity, travel style, and available roof space.
Should I use flexible solar panels on my camper roof?
Flexible solar panels are a good choice for campers because they are lightweight and can fit curved surfaces. They are especially useful when roof weight or installation height is limited.
Do camper solar panels work when driving?
Yes, solar panels can generate electricity while driving if they receive sunlight. However, output depends on weather conditions, roof angle, and shading.
How long do camper solar panels last?
Quality solar panels can typically operate for 20–30 years when properly installed and maintained. Actual lifespan depends on materials, environment, and usage conditions.
Do I need an inverter for camper solar panels?
An inverter is only needed if you want to power AC appliances. DC devices can operate directly from the battery system.
Conclusion: How To Install Solar Panels On A Camper?
How to install solar panels on a camper? The process requires selecting suitable panels, preparing the roof, mounting securely, connecting wiring correctly, and protecting the system from outdoor conditions.
A reliable camper solar installation should focus on:
- Correct solar capacity
- Proper mounting method
- Safe electrical connections
- Waterproof protection
- Long-term durability
At Bright Solar, we believe camper solar systems should be designed around real travel needs, not just product specifications.
Whether installing flexible solar panels on an RV roof or building a complete off-grid camper system, the right design can provide cleaner energy and more freedom on the road.
Related recommendations
-

Do Solar Panels Work in the Night?
100No. Conventional solar panels do not generate useful electricity at night because they need incoming light. Nighttime solar power requires stored energy from...
View details -
how to install flexible solar panel on car roof?
340Learn how to install flexible solar panel on car roof systems safely and efficiently. Discover proven mounting methods, wiring tips, and real-world installation advice from Bright Solar experts.
View details -
How Often to Clean Solar Panels?
247Learn how often to clean solar panels, when washing solar panels is needed, and how proper cleaning improves solar PV performance and long-term energy output.
View details -
How Much Is 1 Solar Panel?
226How much is 1 solar panel? Discover average solar panel prices, cost factors, panel types, and what affects value before you buy. Learn more with Bright Solar.
View details