
how to hook up portable solar panels to rv?
Direct Answer :
To hook up portable solar panels to an RV, connect the panels through a compatible solar charge controller to the RV battery bank, unless the portable solar suitcase already has its own controller. Check battery voltage and chemistry, connector polarity, panel output, fuse protection, and the RV’s solar input specifications before connecting.
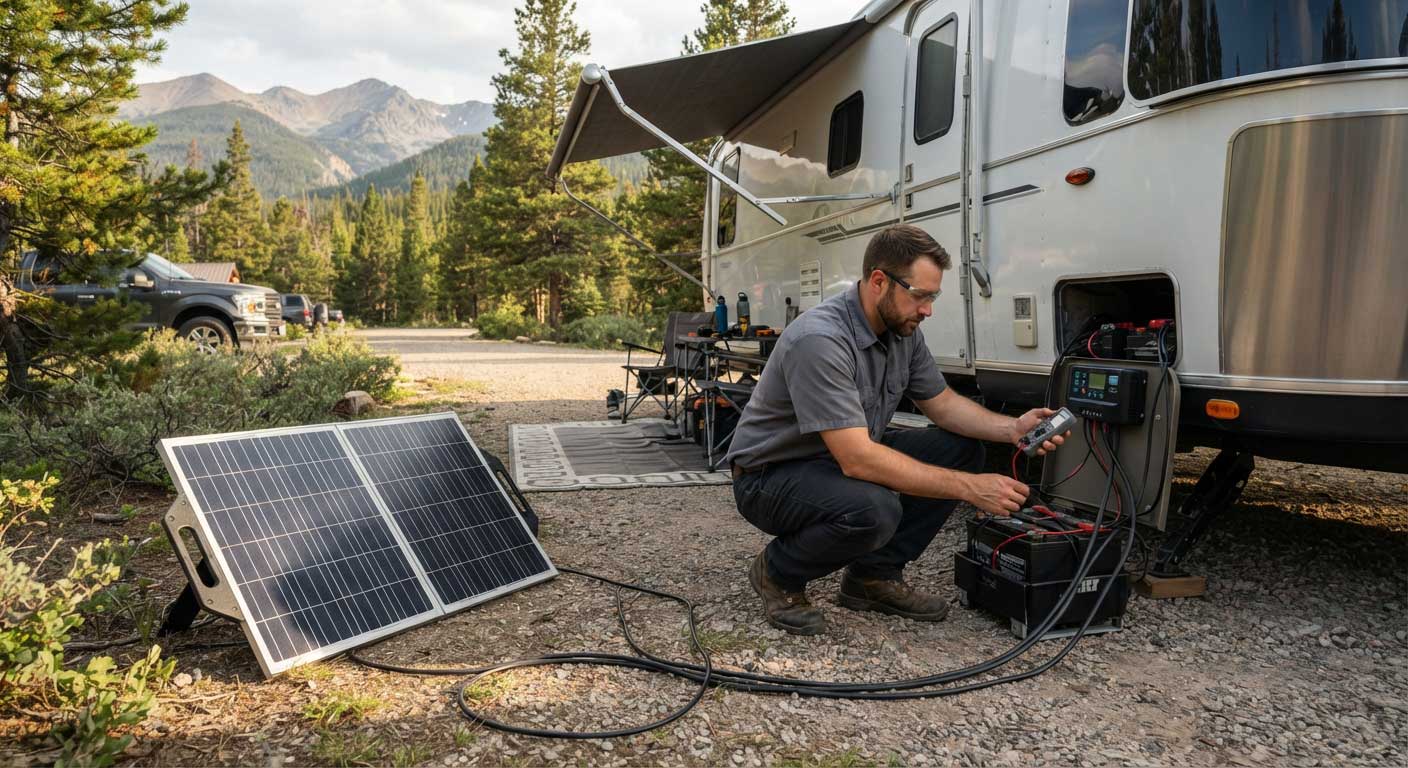
If you are learning how to hook up portable solar panels to rv, start by identifying what equipment is already installed. A portable solar setup can connect through an RV solar-ready port, directly to the battery through an integrated controller, or through a separate charge controller inside the RV.
The physical plug is often the easy part. Matching the electrical system is where installations succeed or fail.
At Bright Solar, our work with Flexible Solar Panels and Portable Solar Panels applications has repeatedly shown the same issue: two RVs can both be described as “solar ready” while using different wiring arrangements or connector polarity. Check the RV documentation and test an unfamiliar port before connecting a panel. Renogy also warns that some solar-ready RV ports may use reversed SAE polarity.
What Equipment Do You Need?
A basic portable RV solar system normally includes:
| Component | Function |
|---|---|
| Portable solar panel | Converts sunlight into DC electricity |
| Charge controller | Regulates charging to the battery |
| RV battery bank | Stores solar energy |
| Solar cables | Carry current between components |
| Fuse or breaker | Protects appropriately sized wiring |
| Adapter, if required | Matches panel and RV connectors |
The basic electrical path is:
Portable Solar Panel → Charge Controller → Fuse/Protection → RV Battery
A solar suitcase with an integrated charge controller is different. For a temporary setup, it may connect to the battery bank using its specified leads or to a suitable solar input designed for that arrangement. A portable panel without a controller needs compatible charging equipment before it is connected to the battery.
Check Your RV Before Connecting the Portable Panels
Is the RV Solar Ready?
Look for:
- An external solar input port
- An SAE, MC4, Anderson, or manufacturer-specific connector
- A label showing voltage or current limits
- Existing wiring to the battery or a charge controller
Do not assume that a port marked “solar ready” contains a charge controller.
Some RV ports simply provide a route to the battery system. Others are intended for specific products or wiring configurations. The RV owner’s manual remains the first reference for the exact port. Renogy’s compatibility guidance specifically notes that a built-in solar port should not be connected to another built-in charge controller without verifying the arrangement.
Check Battery Voltage and Chemistry
Identify the battery bank before selecting or configuring the controller.
Common RV battery types include:
- Flooded lead-acid
- AGM
- Gel
- LiFePO4
Renogy’s RV guidance notes that many RV battery banks range from approximately 85Ah to 200Ah for common AGM or flooded batteries, while some newer RV systems use lithium iron phosphate batteries. Battery capacity and chemistry affect controller selection and charging settings.
How to Hook Up Portable Solar Panels to RV Step by Step
Step 1 — Keep the Panel Out of the Sun During Wiring
Cover the portable panel or place it where it cannot generate significant power while you make connections.
This is a practical safety step. Solar panels begin producing electricity when illuminated, so Renogy’s current off-grid setup guide recommends covering or keeping panels out of the sun before wiring.
Step 2 — Connect the Charge Controller to the RV Battery First
For a system using a separate charge controller:
- Identify battery positive (+) and negative (−).
- Connect the controller’s battery terminals to the corresponding battery terminals.
- Install the specified protection device on the positive circuit where required by the system design.
- Configure the controller for the correct battery chemistry.
The battery-first sequence matters. Renogy’s 2026 setup guidance says to connect the battery to the charge controller first and then connect the solar panel.
Step 3 — Connect the Portable Solar Panel to the Controller
After the battery connection is confirmed, connect:
Panel Positive → Controller PV Positive
Panel Negative → Controller PV Negative
Check polarity before inserting or tightening connectors.
Never judge polarity from connector shape alone. If you are adapting an unfamiliar RV port, use the manufacturer’s documentation or a suitable meter to confirm the arrangement.
Using an RV Solar-Ready Port
A solar-ready port can make portable deployment faster, but it should be checked before use.
The correct question is not simply, “Does the connector fit?”
Check:
- Where the port leads
- Whether a controller is already installed
- Connector polarity
- Maximum current and voltage
- Whether an adapter reverses polarity
For a low-energy RV trip, Renogy describes a solar suitcase with an included controller as one possible temporary solution. Its guidance also notes that solar-ready plugs may have reversed polarity depending on the RV and intended product system.
How Much Power Can Portable RV Solar Panels Produce?
A panel’s rated wattage is not the same as guaranteed outdoor output.
PV modules are rated under Standard Test Conditions of 1,000 W/m² irradiance and a 25°C cell temperature. The U.S. Department of Energy explains that actual sunlight is often below 1,000 W/m² and operating cell temperatures are frequently higher than 25°C. Panel angle, season, shading, and temperature therefore change real production.
That matters for portable panels. Moving a panel a few meters away from an RV roof shadow can sometimes be more useful than adding another panel with the same poor exposure.
Choosing the Right Connection for a Portable RV
The best portable setup depends less on the panel’s headline wattage and more on how the RV is already wired.
For a temporary campsite setup, there are two common arrangements:
| RV setup | Connection approach | What to verify |
|---|---|---|
| Solar-ready port | Panel/suitcase → RV solar port | Port polarity and controller arrangement |
| Separate controller | Panel → controller → battery | Controller PV limits and battery settings |
| Suitcase with built-in controller | Suitcase → battery/RV input | Integrated controller specifications |
| Larger portable array | Multiple panels → controller → battery | Series/parallel voltage and current |
A useful field check is to trace the cable before plugging anything in. If the RV’s external solar port already routes to a charge controller, adding another controller in the same path can create a compatibility problem. The port should be treated as part of the RV’s electrical system, not simply as a convenient connector.
Portable Solar Panels for RV Battery Charging
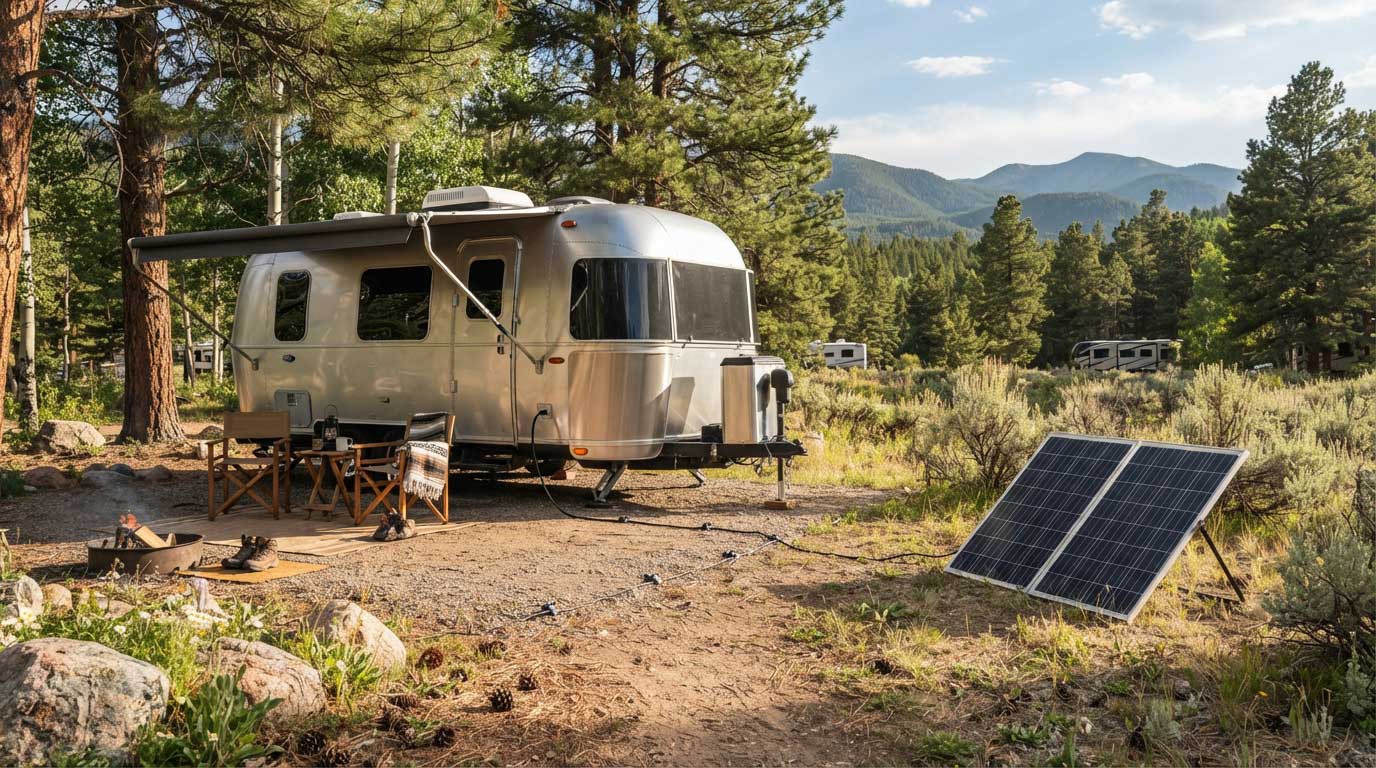
Portable panels are particularly useful when the RV itself is parked in shade.
A common campsite situation is a trailer under trees while an open patch of sunlight is 10–20 feet away. A portable panel can be moved into that sunlight without moving the vehicle. The trade-off is cable length: as the cable run becomes longer, voltage drop becomes more relevant, so cable size should be selected for the actual current and distance.
For a portable RV system, keep these practical points in mind:
- Put the panel where shading is minimized.
- Keep unnecessary cable runs short.
- Avoid loose cables across walking areas.
- Protect connectors from standing water and physical damage.
- Use the manufacturer’s specified cable and connector ratings.
- Do not substitute a connector simply because it physically fits.
Renogy’s current controller guidance specifically identifies insufficient sunlight, shading, PV wiring, polarity, and voltage drop from excessively long PV cables as possible reasons for reduced charging current.
How to Check an RV Solar Connection Before Camping
A five-minute check at home can prevent a frustrating campsite diagnosis.
Check the Battery Side
Confirm:
- Battery positive and negative terminals
- Battery voltage
- Battery chemistry
- Battery fuse or protection
- Charge-controller battery settings
The controller should recognize the battery correctly before solar power is introduced. For separate-controller systems, current manufacturer guidance recommends connecting the battery first and the solar panels afterward.
Check the Solar Side
Read the panel label and record:
- Voc
- Vmp
- Isc
- Imp
- Rated power
Then compare those figures with the controller’s maximum PV input.
This becomes especially important if two or more portable panels will be combined. A series connection raises array voltage; a parallel connection raises array current. The controller must remain within both limits.
Check the RV Port
If the RV has a factory-installed solar-ready port, verify its polarity before connecting an unfamiliar portable panel.
This is not theoretical. Renogy documents RV solar-ready ports with intentionally reversed polarity on some vehicles and recommends checking the port with a voltmeter or multimeter before connection.
What If the RV Battery Is Not Charging?
Do not immediately replace the panel.
Start with the display on the charge controller, if one is installed. Then work backward.
No Solar Input
Check sunlight, connector seating, polarity, panel voltage, and the PV fuse if the system has one.
Solar Input but Little Charging
The battery may already be near its charge limit, or the available sunlight may simply be weak. Shading is easy to overlook when a panel is several feet away from the RV.
Controller Does Not Detect the Battery
Measure battery voltage and inspect the battery-side wiring and fuse. A controller that cannot correctly identify the battery should not be “fixed” by repeatedly reconnecting the solar panel.
Renogy’s current troubleshooting guidance recommends checking the battery voltage, wiring, polarity, fuse, PV voltage, panel configuration, and sunlight when a controller does not charge correctly.
How Much Solar Power Does an RV Really Receive?
A 200W portable panel does not mean the RV battery receives 200W continuously.
The U.S. Department of Energy states that PV module performance ratings use Standard Test Conditions of 1,000 W/m² irradiance and 25°C cell temperature. Actual outdoor conditions are normally different, and sunlight intensity, temperature, time of day, season, and panel angle all influence production.
That explains a common campsite observation: a panel can be working correctly while its controller display shows substantially less than its nameplate rating.
For portable RV solar, panel placement can be as important as panel size. Moving a panel out from behind an awning or tree shadow may improve useful charging more effectively than simply choosing a larger panel and leaving it partially shaded.
Safety Points Before Leaving the RV
Before putting the system into regular use:
- Confirm positive and negative polarity.
- Confirm the controller’s PV voltage and current limits.
- Use the specified fuse or circuit protection.
- Secure loose cables.
- Keep connectors clean and dry.
- Do not connect a bare solar panel directly to a battery unless the equipment is specifically designed for that configuration.
- Follow the panel, controller, battery, and RV manufacturer’s instructions.
For a separate charge controller, the documented connection sequence is battery first, solar second. When disconnecting, remove the solar source before disconnecting the battery.
FAQ About how to hook up portable solar panels to rv?
Can I connect portable solar panels directly to my RV?
Yes, if the RV has a compatible solar input designed for that purpose and the panel/controller arrangement matches the RV’s specifications. Otherwise, use a properly sized external charge controller.
Do portable solar panels need a charge controller for an RV?
A conventional panel connected to an RV battery needs appropriate charge-control equipment. Some portable solar suitcases already contain an integrated controller, so an additional controller may not be required.
Can I use a 100W portable solar panel with an RV?
Yes, a 100W panel can be used for smaller RV electrical loads and battery maintenance when its voltage and connection method are compatible with the RV system. Actual charging depends on sunlight and battery conditions.
Can I connect two portable solar panels to my RV?
Yes, provided the charge controller or RV solar input accepts their combined voltage, current, and power. Series and parallel configurations produce different electrical characteristics.
Why is my RV solar panel not charging the battery?
Check sunlight, battery voltage, controller status, polarity, fuse condition, cable connections, and PV voltage. A solar-ready RV port should also be checked for polarity and compatibility.
Can portable solar panels charge a lithium RV battery?
Yes, when the charge controller supports the battery’s chemistry and the charging parameters are configured according to the battery manufacturer’s requirements. The panel and controller must also remain within their electrical limits.
Can I leave portable solar panels connected while camping?
Yes, when the complete system is designed for continuous charging and all components are rated for outdoor use. Secure the panels, cables, and connectors against weather, movement, and accidental damage.
Conclusion
The practical answer to how to hook up portable solar panels to rv is to identify the RV’s existing solar wiring first, then connect the portable panel through a compatible controller or approved solar-ready input. Check polarity, battery chemistry, PV voltage, current, cable sizing, and protection before the first campsite trip.
Portable solar works particularly well when the RV is shaded but nearby ground receives direct sunlight. That flexibility is one of its biggest advantages: the vehicle stays where it is, while the panel moves to where the sun is.
Related recommendations
-

How Much Is One Solar Panel Cost?
176How much is one solar panel cost? Learn solar panel prices, wattage factors, technology differences, and expert buying advice from Bright Solar.
View details -
How Flexible Are Flexible Solar Panels?
209How flexible are flexible solar panels in actual use? Learn real bend limits, durability facts, RV and marine applications, and expert insights from Bright Solar.
View details -
How Long Does a Solar Panel Last?
125How long does a solar panel last? Learn solar panel lifespan, degradation rates, maintenance factors, and expert insights to maximize residential solar performance with Bright Solar.
View details -
How Much Is a Portable Solar Panel?
266How much is a portable solar panel in 2026? Discover real pricing, wattage costs, durability, and buying tips from field-tested portable solar experts at Bright Solar.
View details